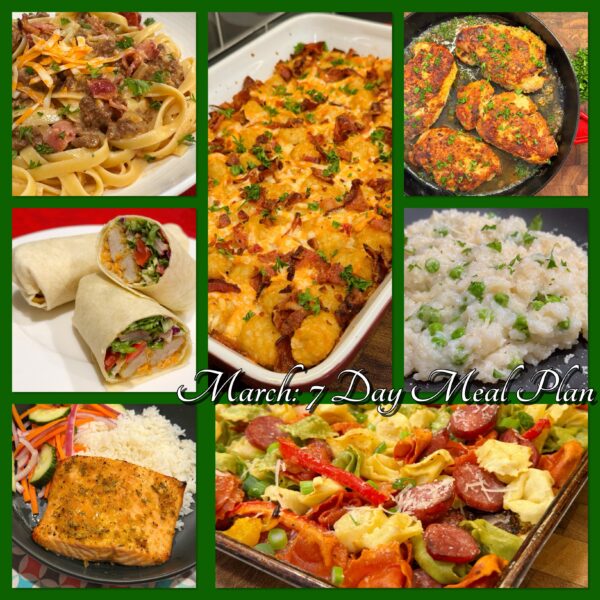
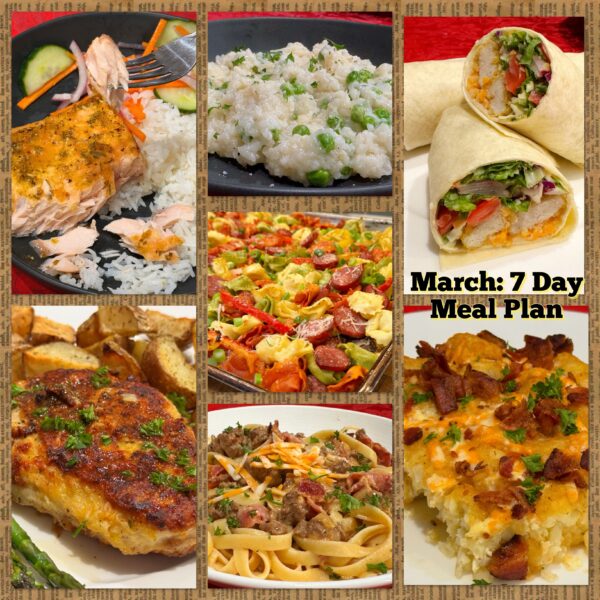
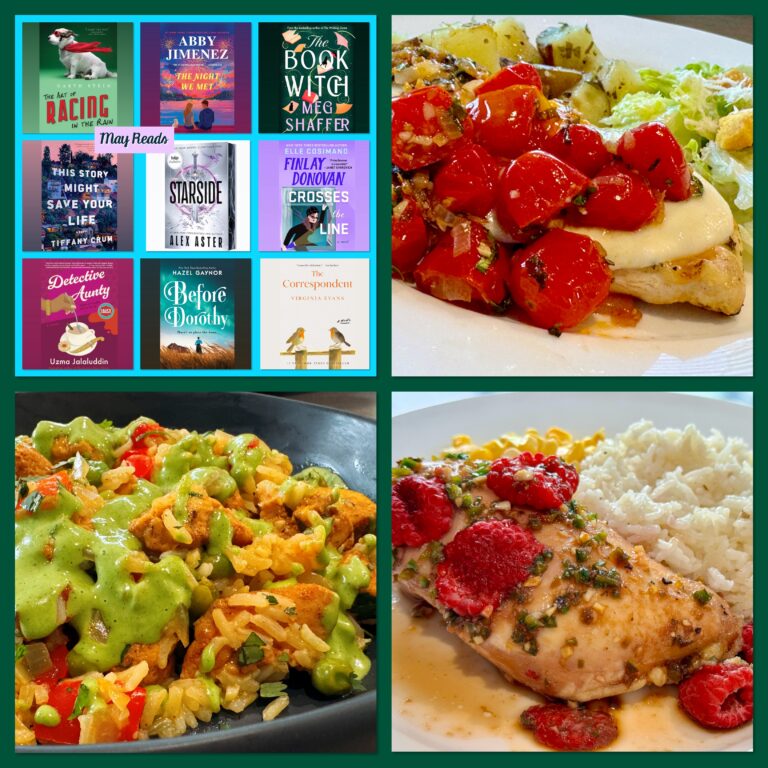
March: Meal Plan on a Budget!
According to Canada’s Food Price Report for 2026, a family of 4 will spend $17,571.79 on groceries this year — that’s up $994.63 from 2025!
That’s $1464.32 a month.
That’s roughly $366 a week.
NEW CHALLENGE!!!
Let’s feed me, my husband, our 17 year old and our 13 year old for about HALF that and make a week long menu plan for under $183!
Ninja and I keep a running tab of all our grocery expenditures. This is our spending for February!

We spent $702.36 and used $40.00 in points, leaving our monthly spending at $662.36, clearly keeping to our budget and actually came in $69.64 under for the month, and we were under budget by $36.45 for the year!
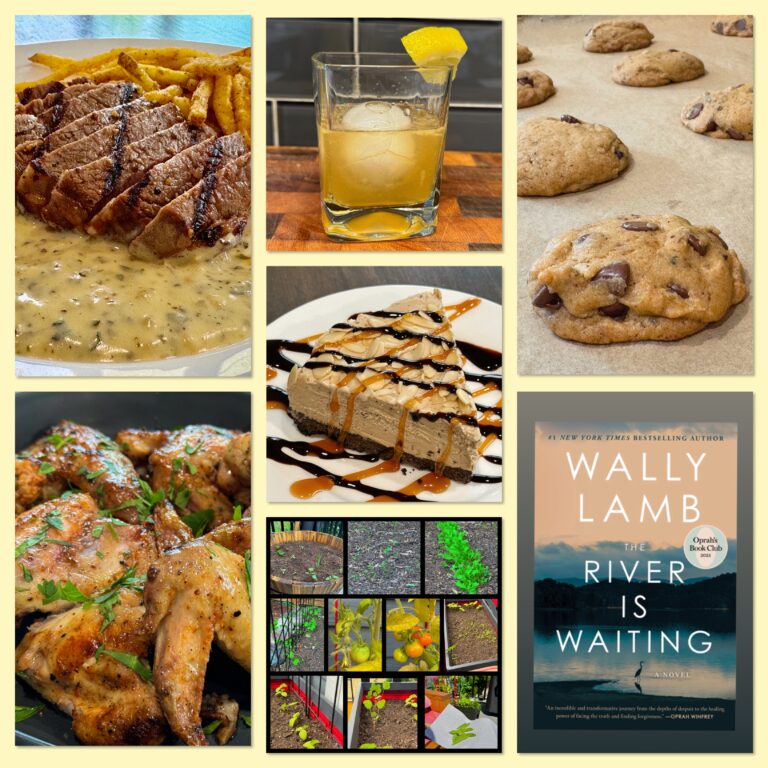
Here is the March weekly meal plan staying close to my budget of $183! I want you to have all the tools to be able to feed your family 7 healthy(ish) meals, while not putting yourself into the poorhouse! I hope you enjoy and please let me know if you follow this weekly plan and if you were able to stick to the budget! Click on the recipe listed in the MENU below and it will take you directly to the recipe!!

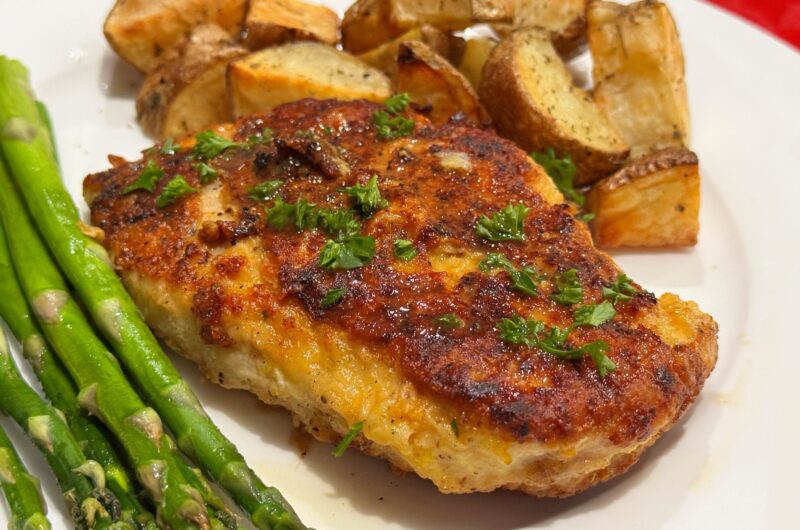
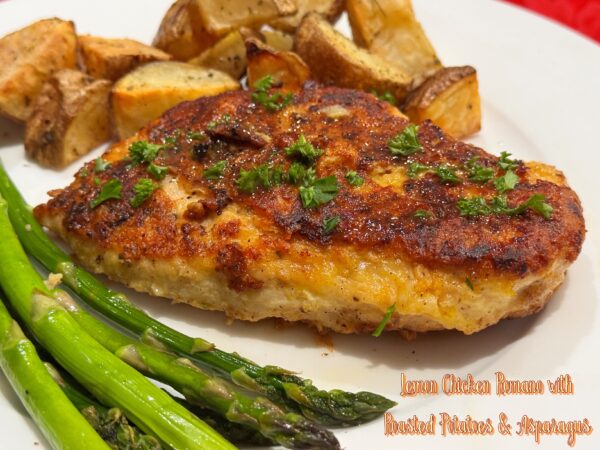
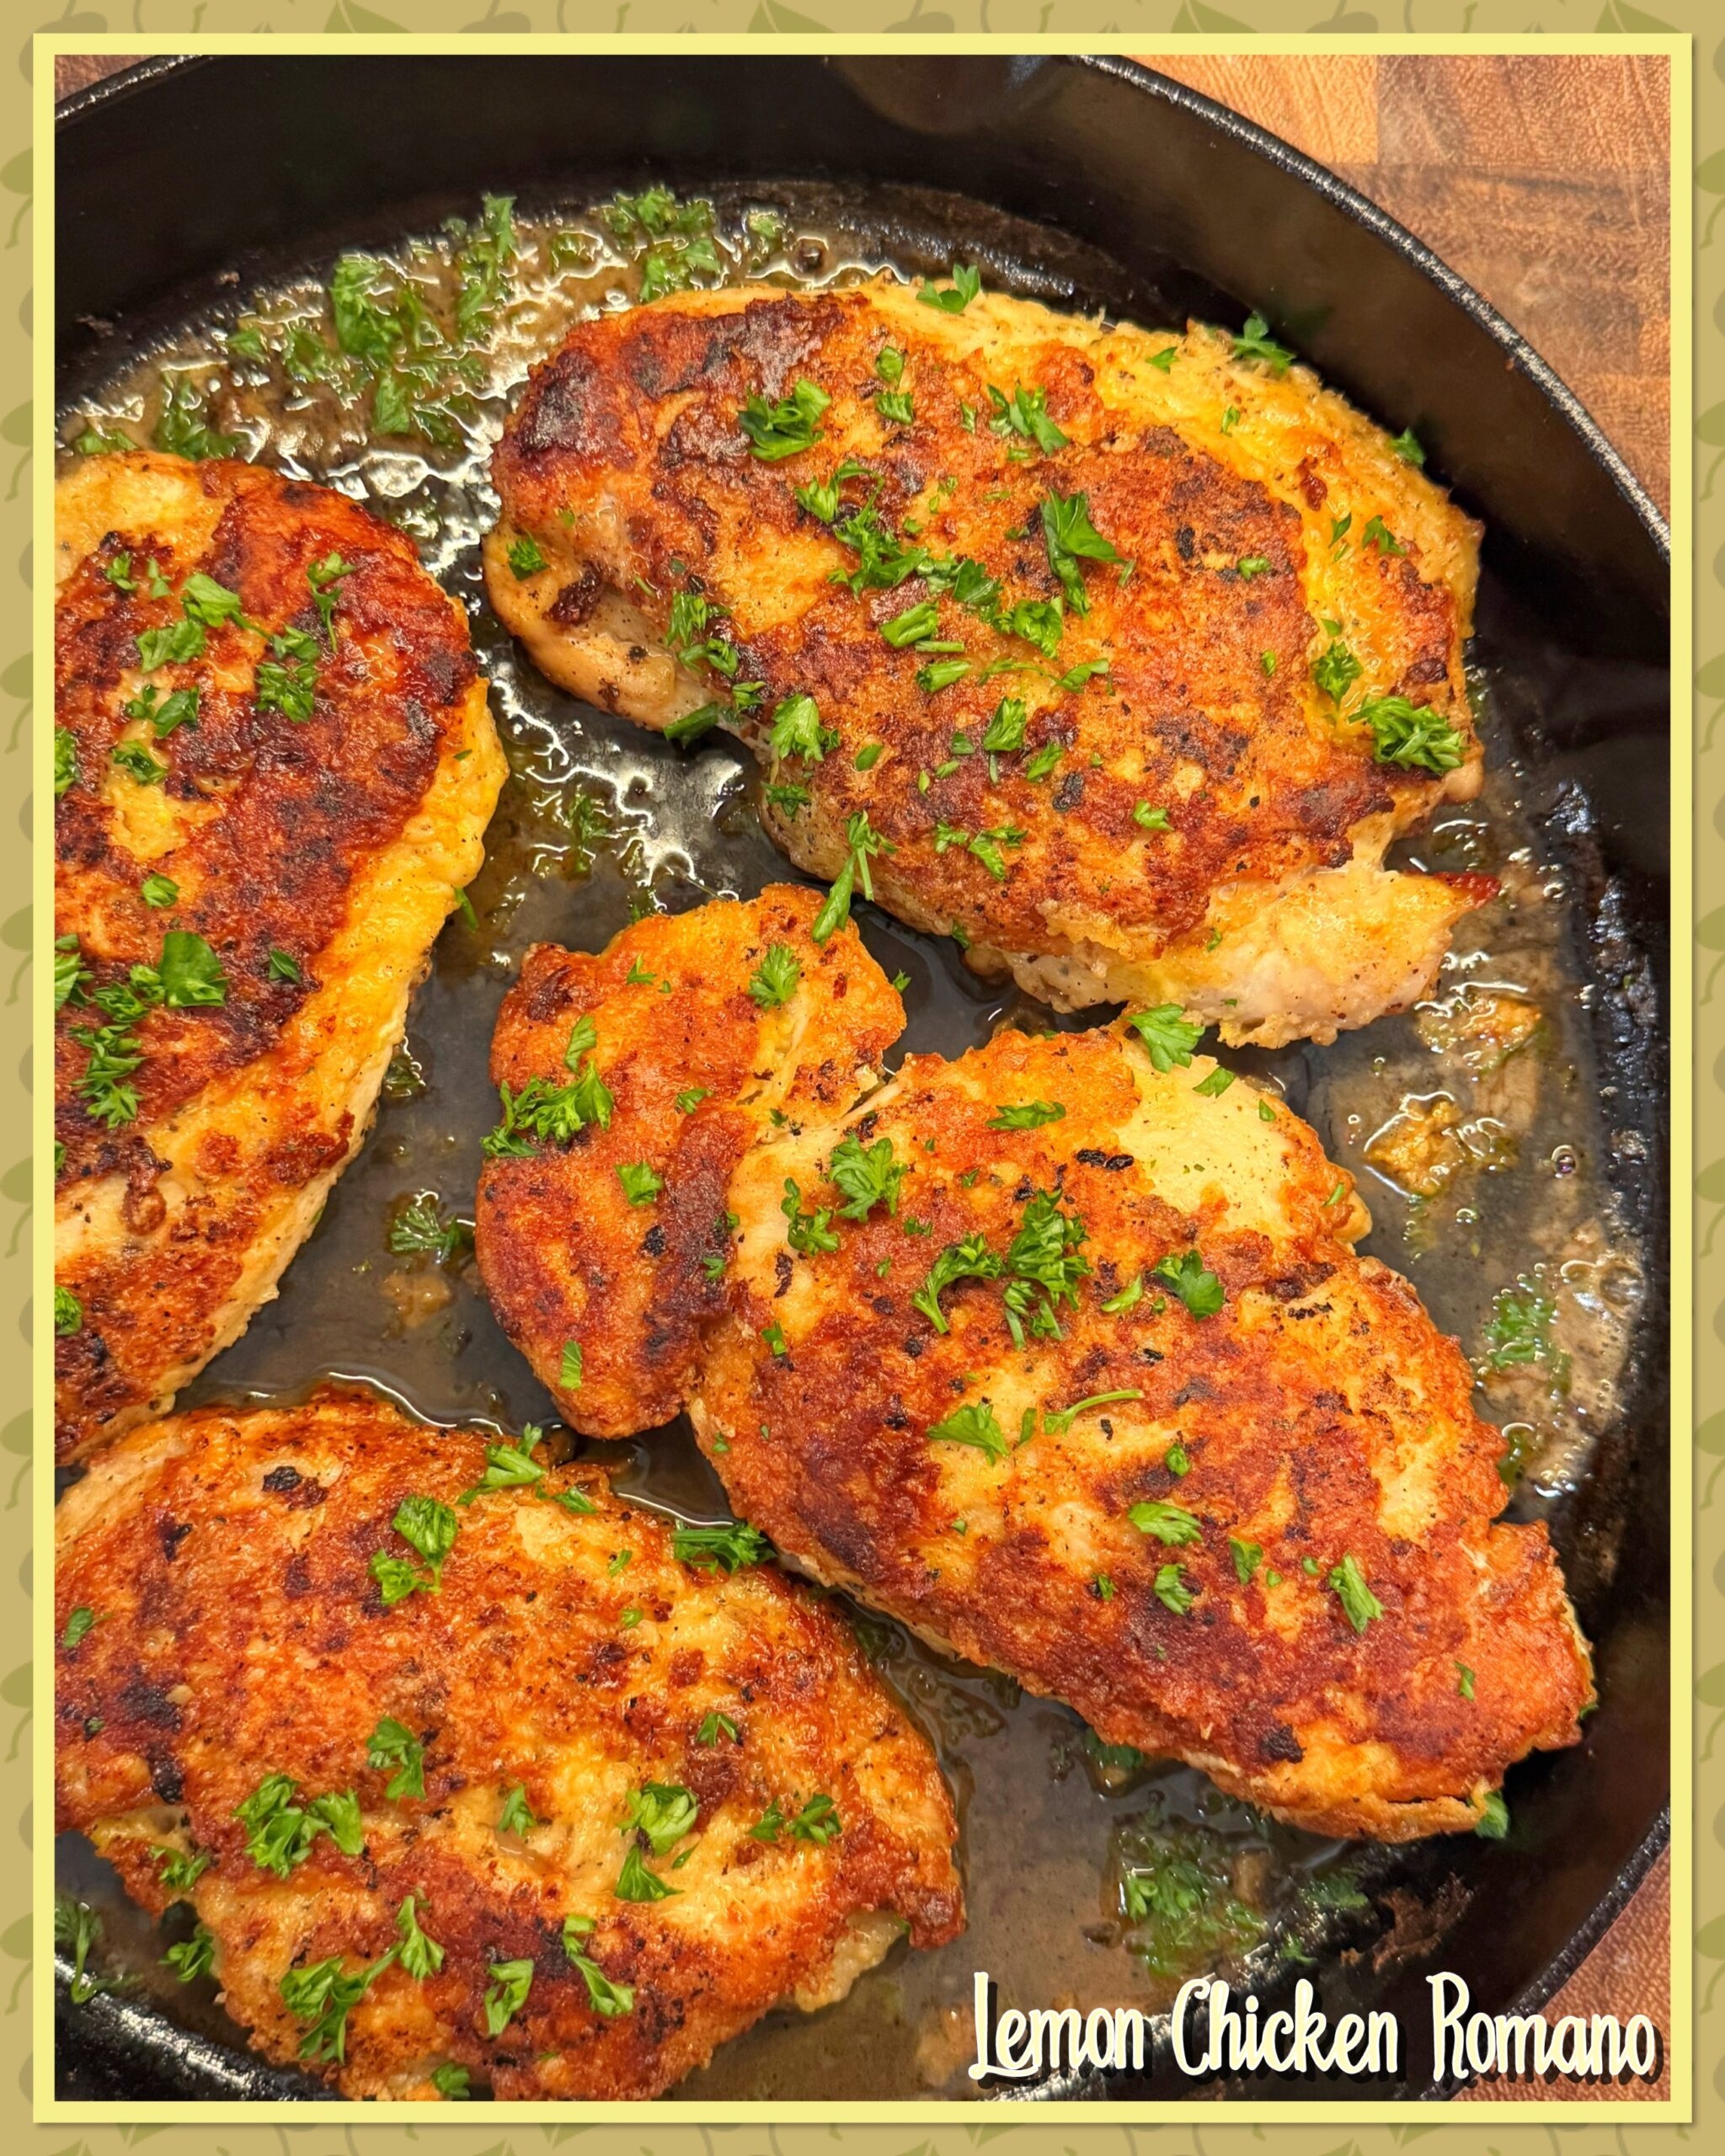
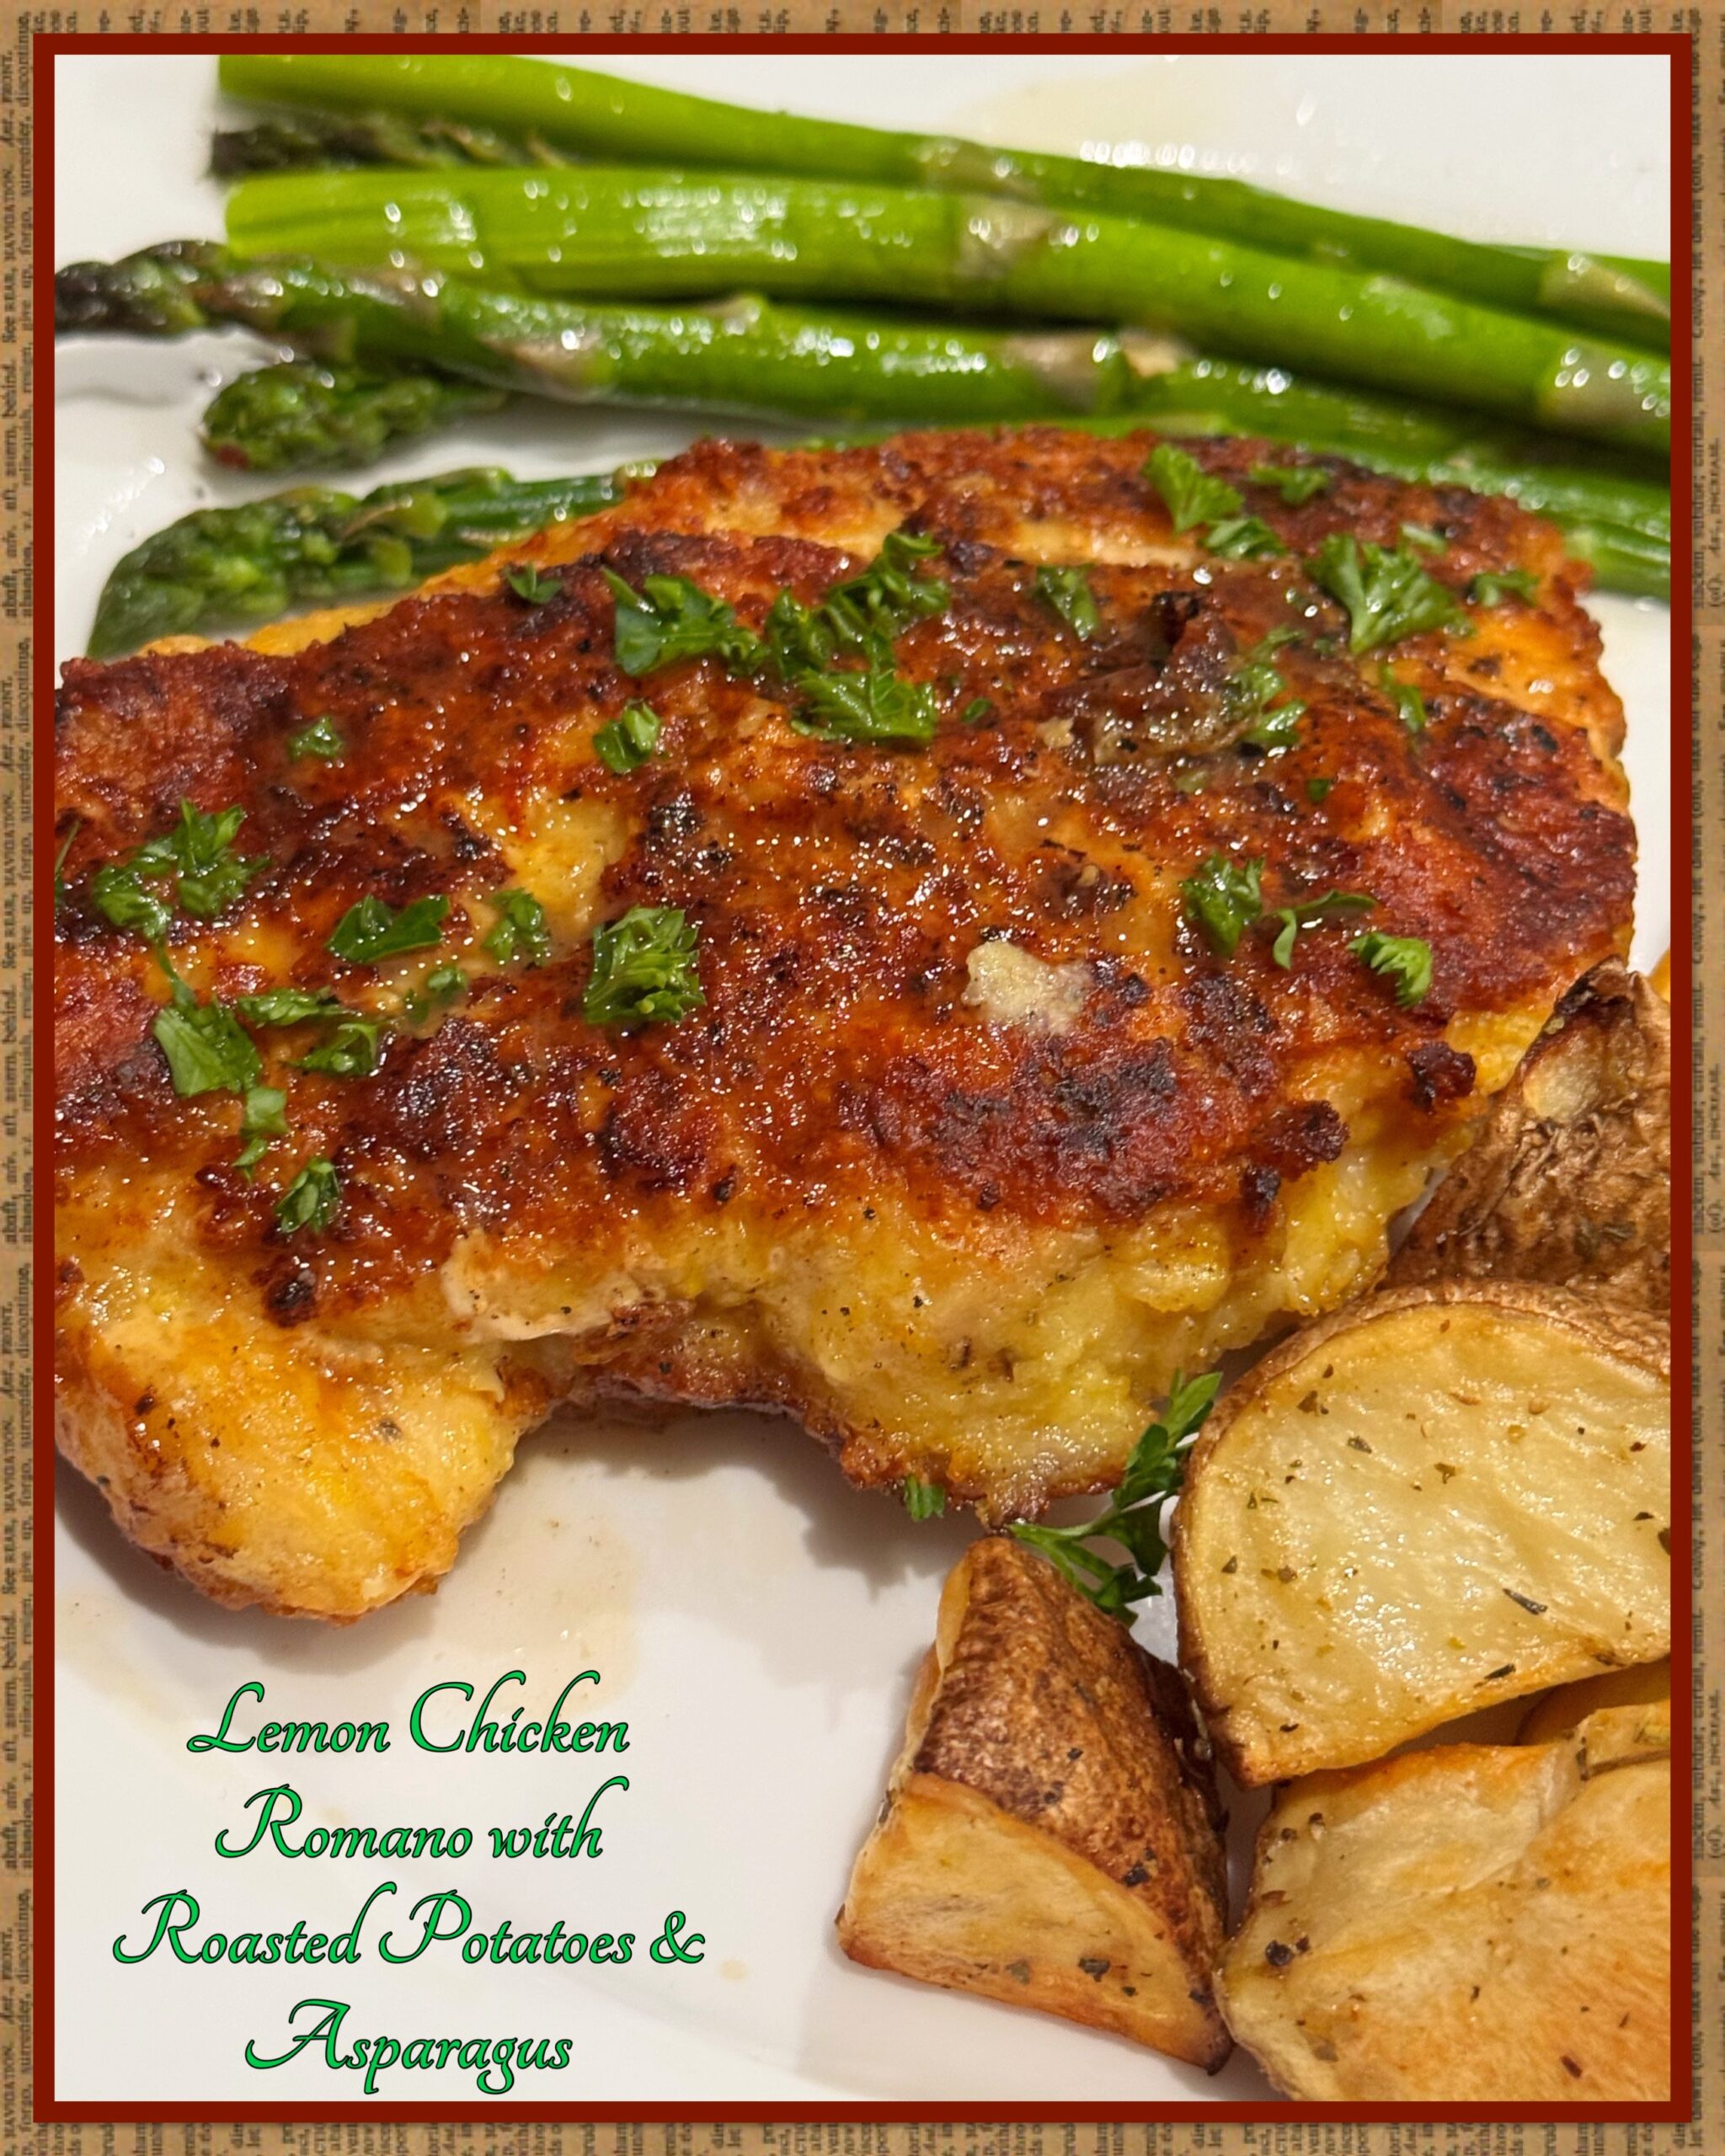
Lemon Chicken Romano
4
servings20
minutes20
minutesIngredients
3-4 chicken breasts
1 cup flour
2 eggs
1/3 cup Romano cheese, grated
1 tablespoon lemon zest
1/4 cup lemon juice
1/2 cup chicken stock
1/4 cup white wine
1/4 cup olive oil
Salt and pepper, to taste
GARNISH: 1/4 cup parsley, chopped
Directions
Flatten the chicken breasts to an even thickness, about 1/2 inch. Season the chicken breasts with salt and pepper on both sides and set them aside.
Place the flour in a shallow dish. In a separate shallow dish, beat the eggs with a fork. In a third dish, mix the grated cheese and lemon zest together.
Dredge each chicken breast first in the flour, shaking off any excess. Next, dip it into the beaten eggs, allowing any excess to drip off. Finally, coat it with the cheese and lemon zest mixture, pressing gently so the mixture adheres well.
In a large skillet, heat the oil over medium-high heat. Add the coated chicken breasts. Cook for about 4-5 minutes on each side until golden brown and fully cooked through. Transfer the chicken to a plate and keep warm.
In the same skillet, reduce the heat to medium and add the lemon juice, chicken broth, and white wine. Scrape any browned bits from the bottom of the pan with a wooden spoon. Let the mixture simmer for about 2-3 minutes until it reduces slightly.
Return the chicken breasts to the skillet, coating them with the sauce. Allow them to heat through for another 1-2 minutes, turning them once.
Transfer the chicken to plates and spoon the sauce over each piece. Garnish with chopped parsley.

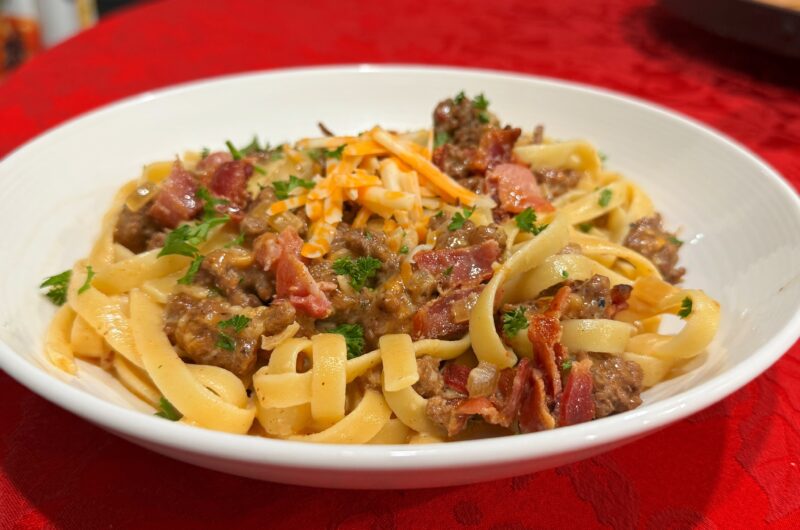
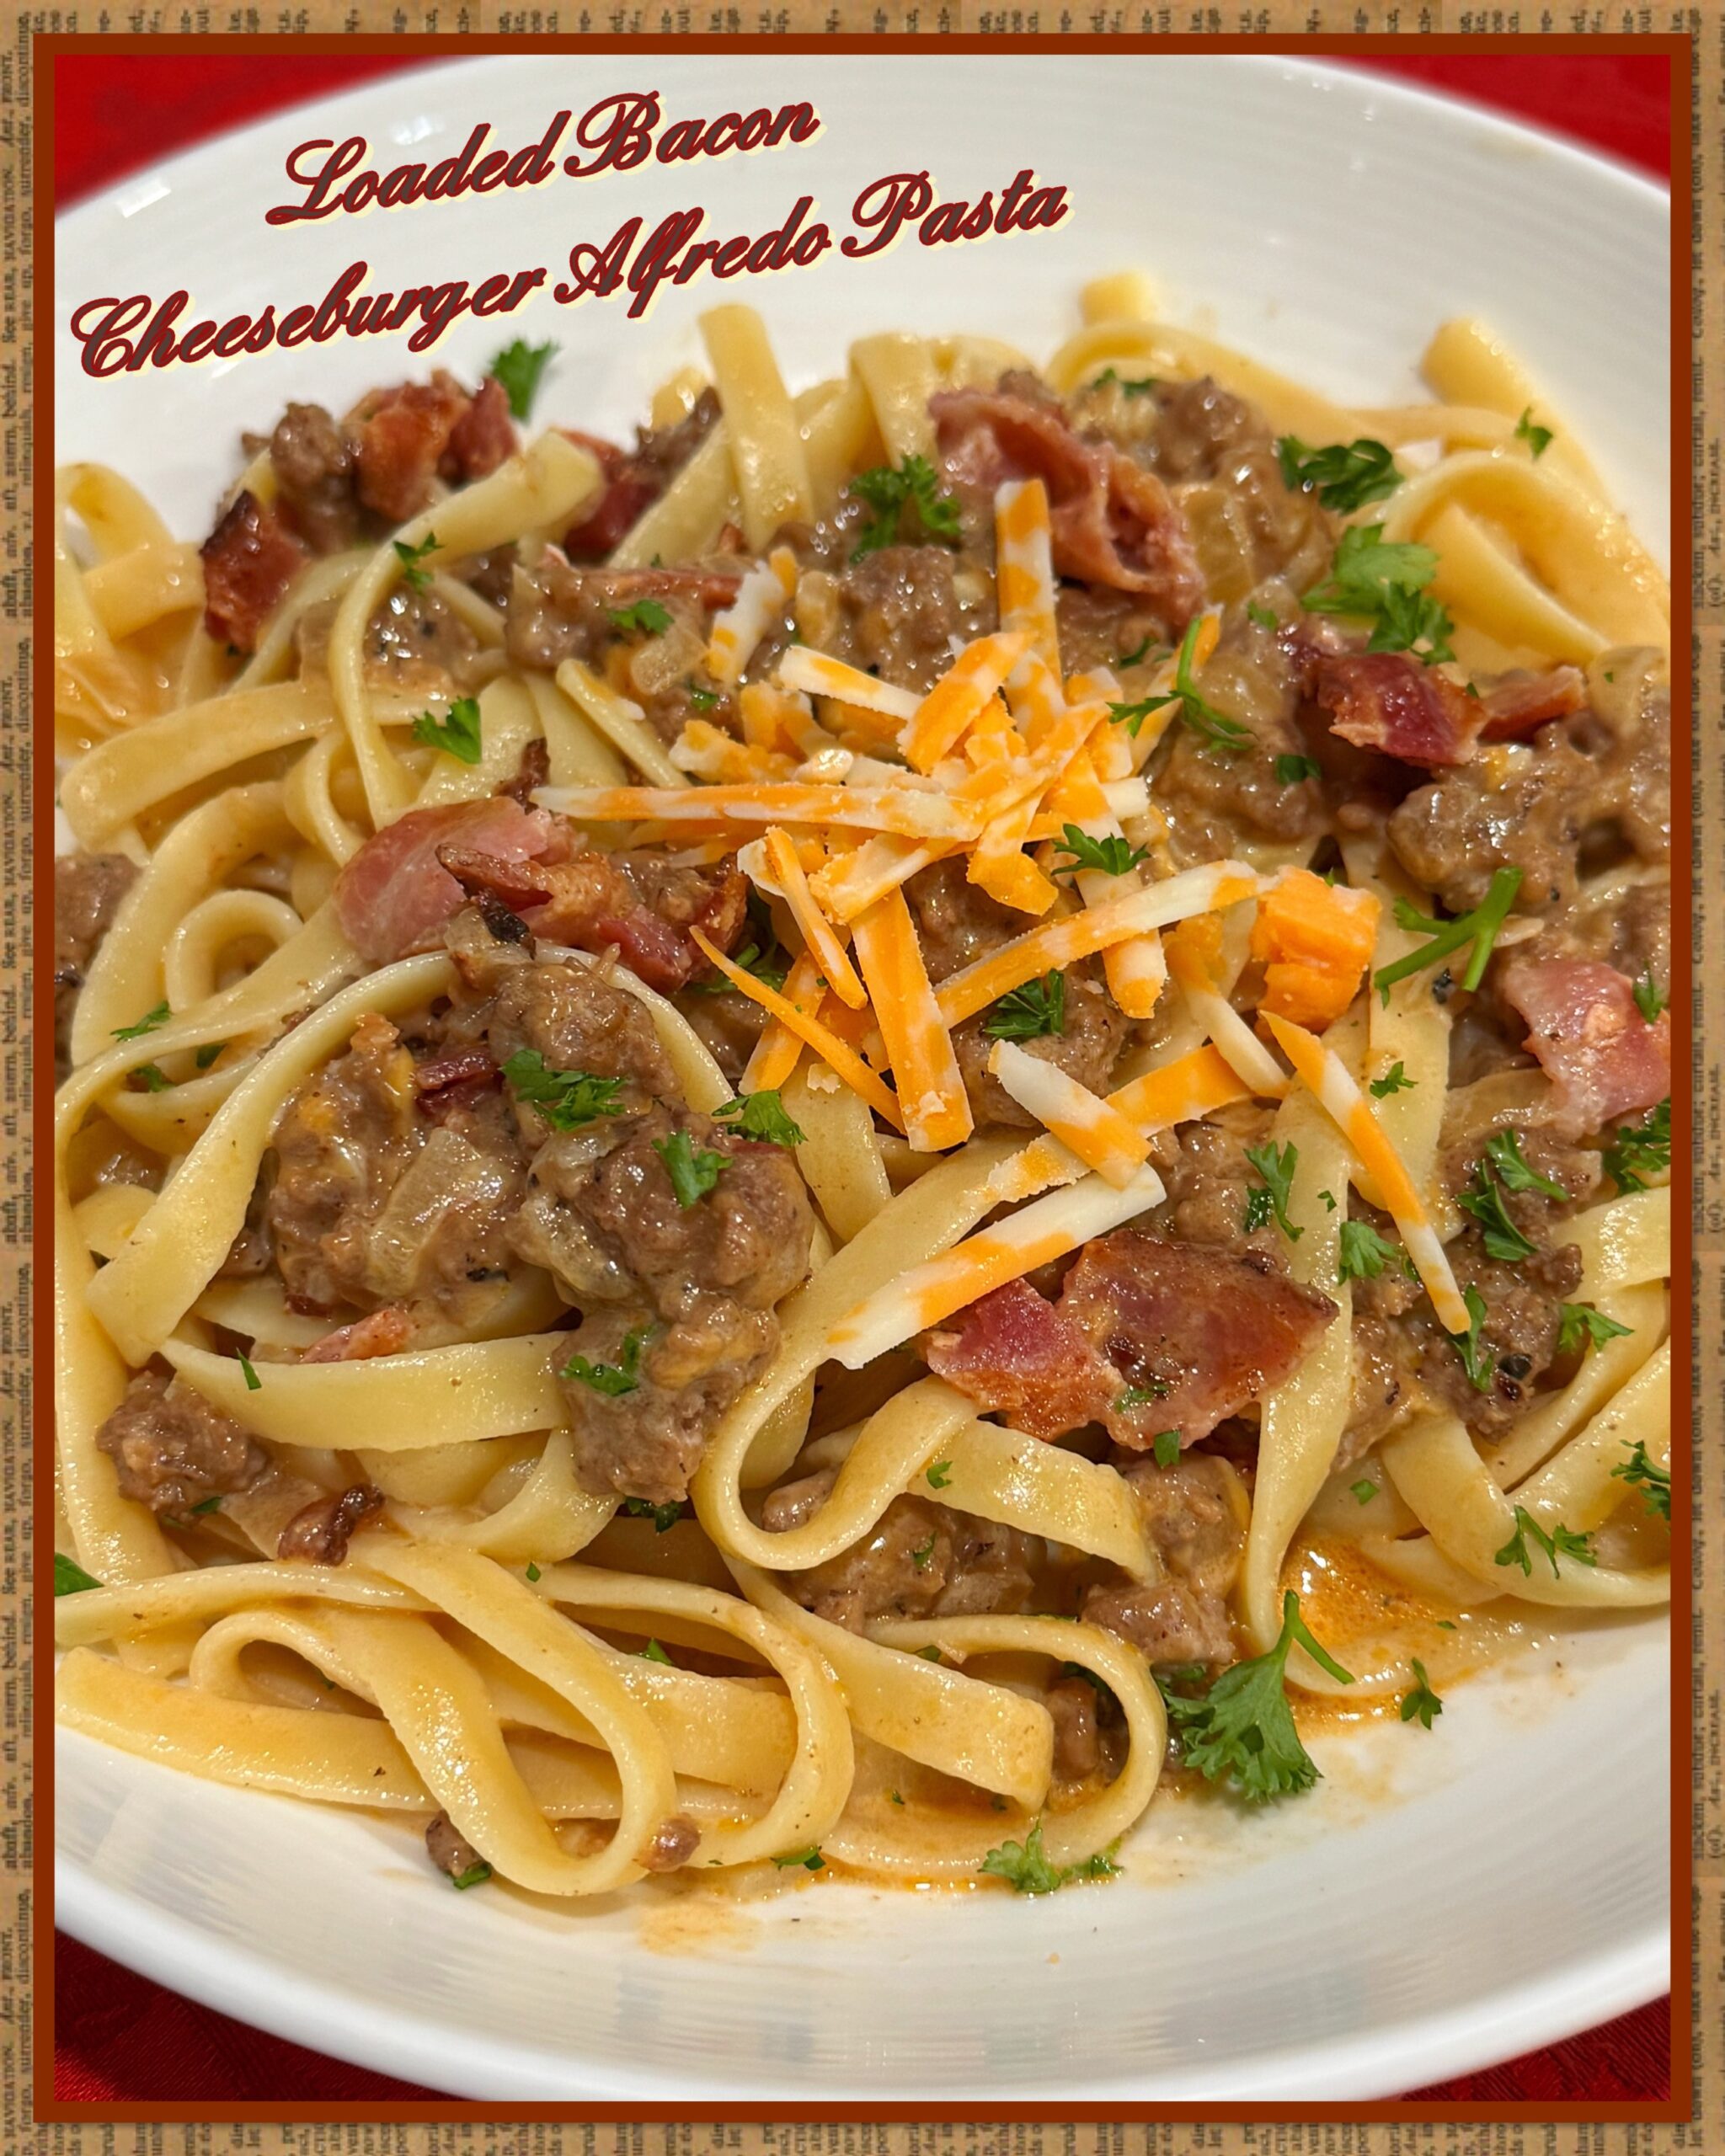
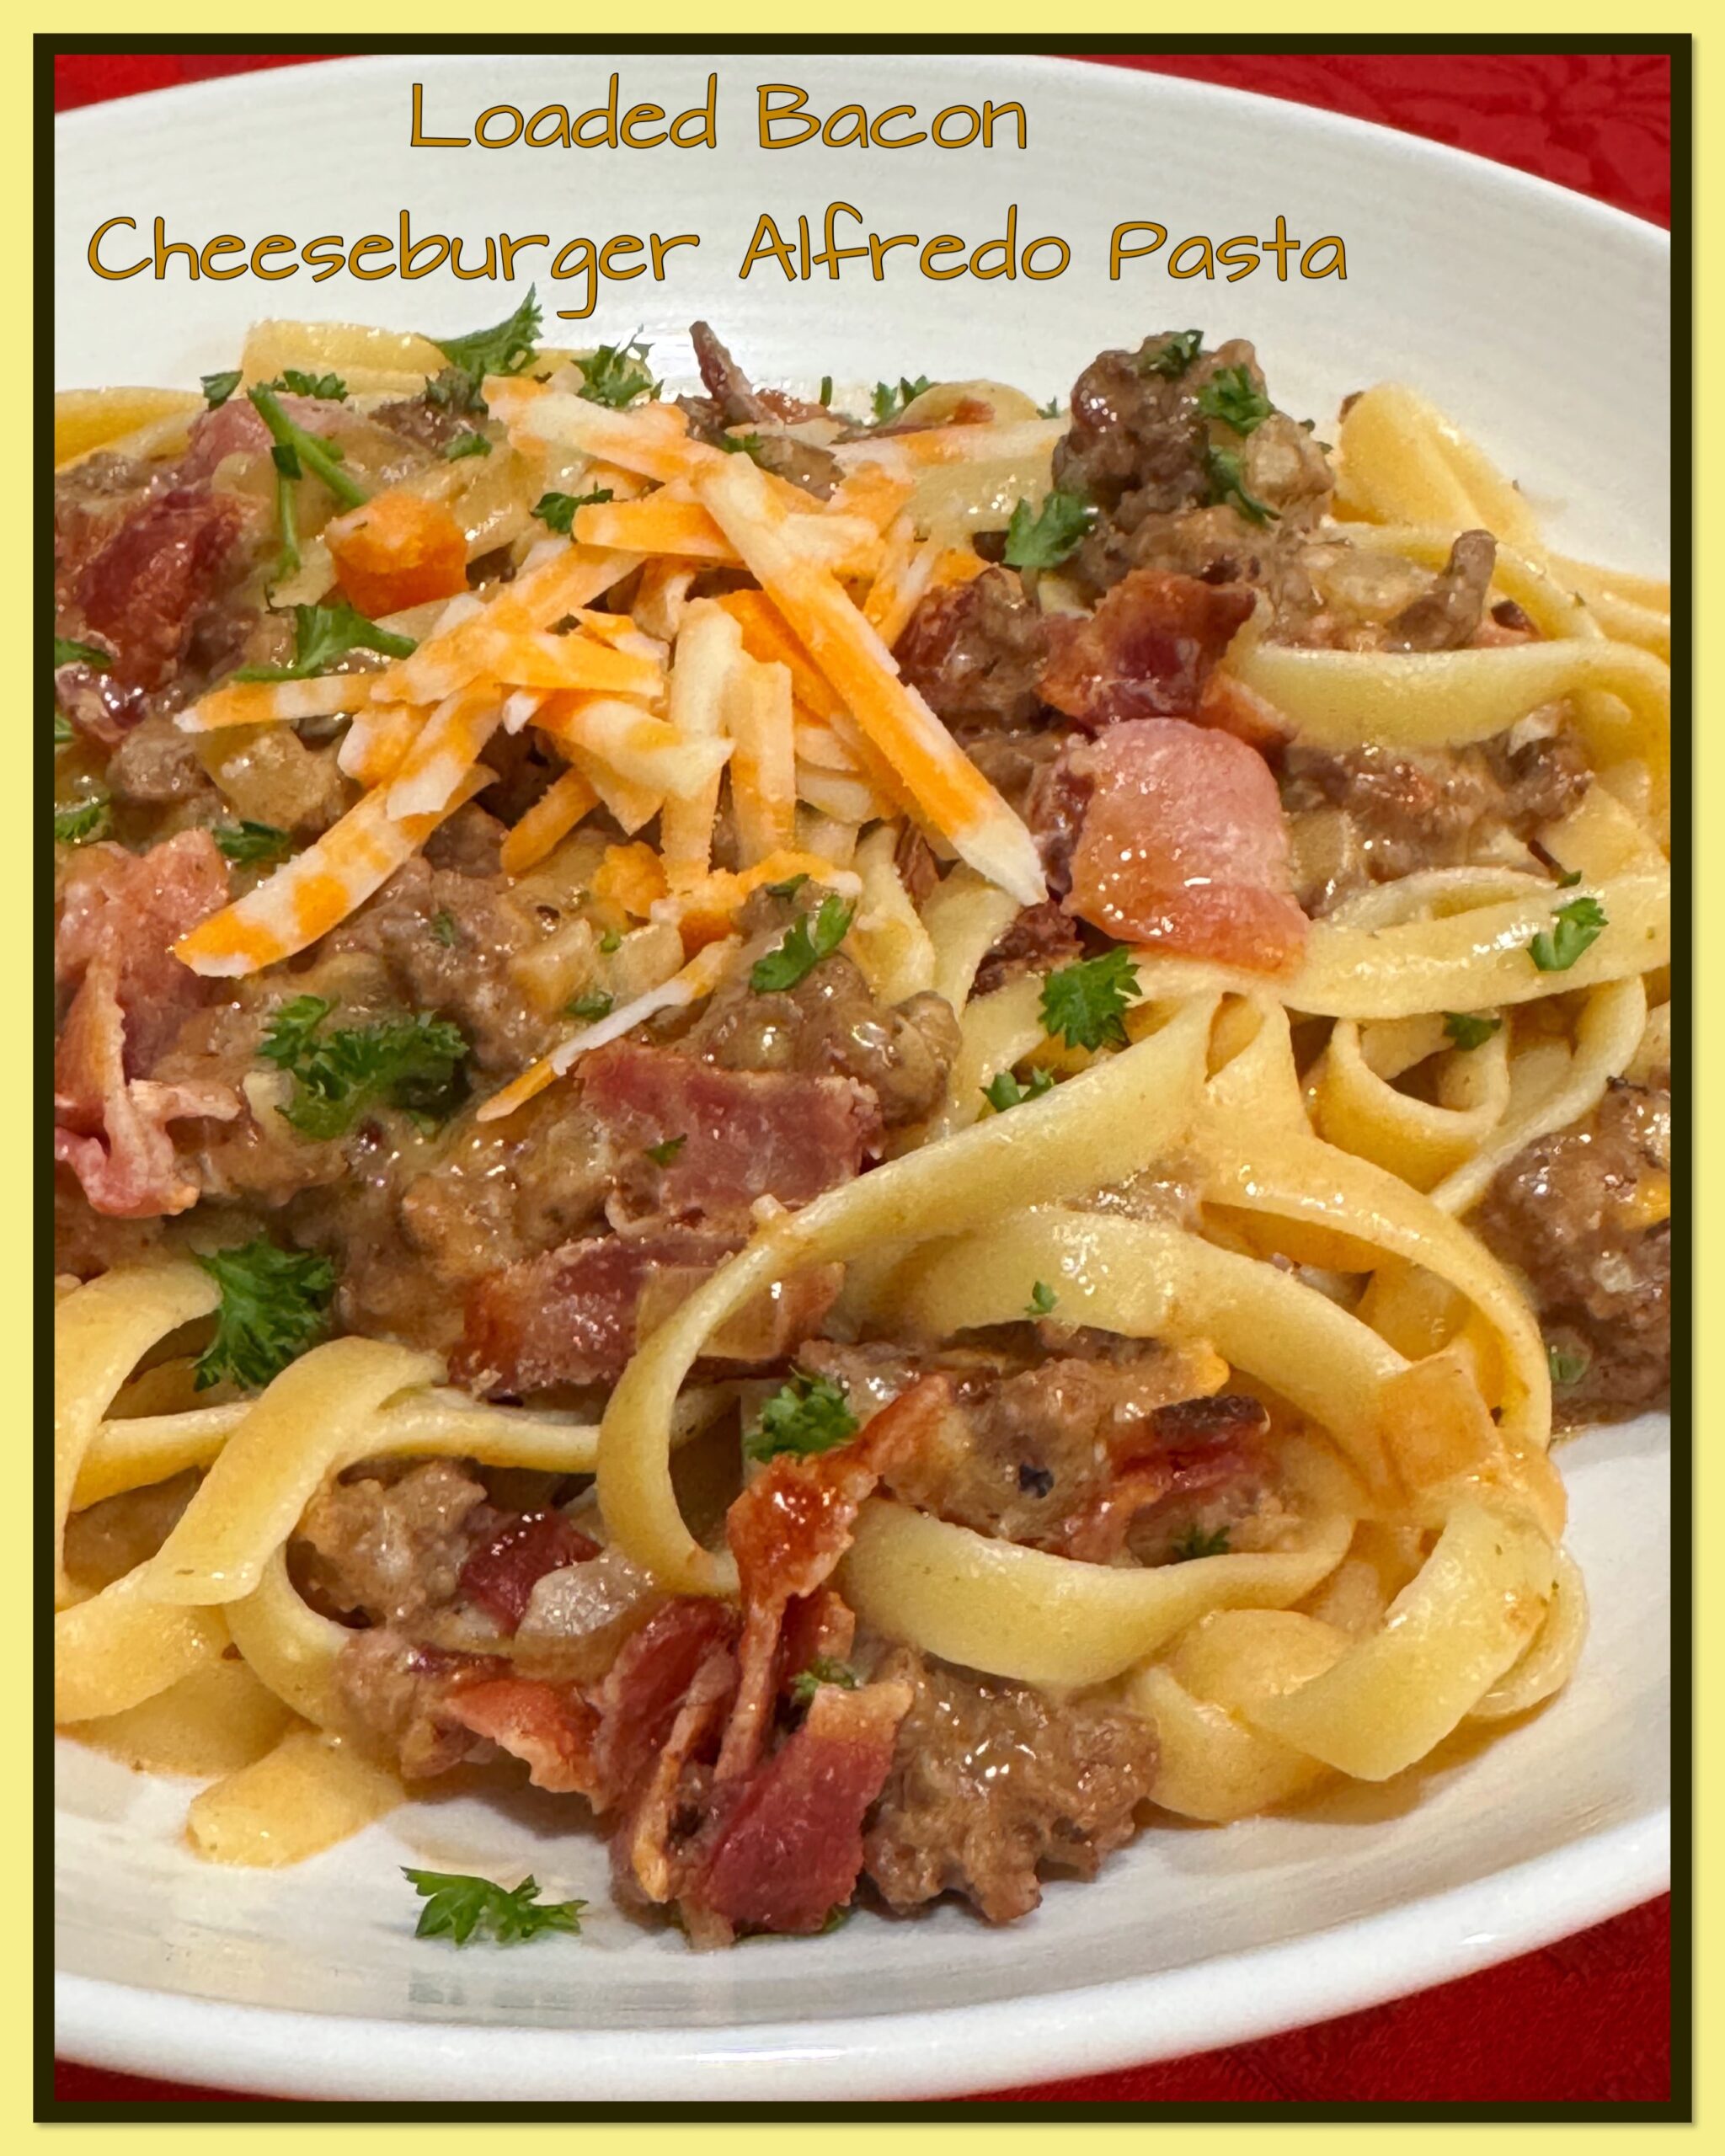
Loaded Bacon Cheeseburger Alfredo Pasta
4
servings15
minutes30
minutesIngredients
12 oz fettuccine
1 lb ground beef
8 slices of bacon, chopped
1 onion, finely chopped
2 cloves garlic, minced
1 cup heavy cream
1 cup Parmesan cheese, grated
2 cups cheddar cheese, shredded
1 1/2 cups beef broth
1 tablespoon Worcestershire sauce
1 tablespoon tomato paste
1 tablespoon olive oil
Salt and pepper, to taste
Garnish: parsley, chopped
Directions
Cook the pasta in a large pot of salted boiling water until al dente according to the package instructions. Drain and set aside.
In a large skillet, cook bacon over medium heat until crispy. Remove the bacon from the skillet and set aside. Leaving about 1 tablespoon of bacon fat in the skillet.
In the same skillet, add olive oil and sauté onion until soft and translucent. Add minced garlic and cook for another 1 minute until fragrant.
Add ground beef to the skillet and cook until browned, breaking it up into smaller pieces as it cooks. Drain excess fat if necessary.
Stir in tomato paste and Worcestershire sauce, mixing well to combine with the beef. Pour in beef broth and bring to a simmer. Let it cook for about 5 minutes to allow the flavours to meld together.
Reduce the heat to low, then add the heavy cream. Stir in Parmesan cheese until melted and smooth. Add the shredded cheddar cheese a handful at a time, stirring until each addition is melted and the sauce is creamy and thick.
Season with salt, pepper, and a pinch of red pepper flakes.Combine the pasta and bacon with the sauce, tossing until well coated. Garnish with parsley.


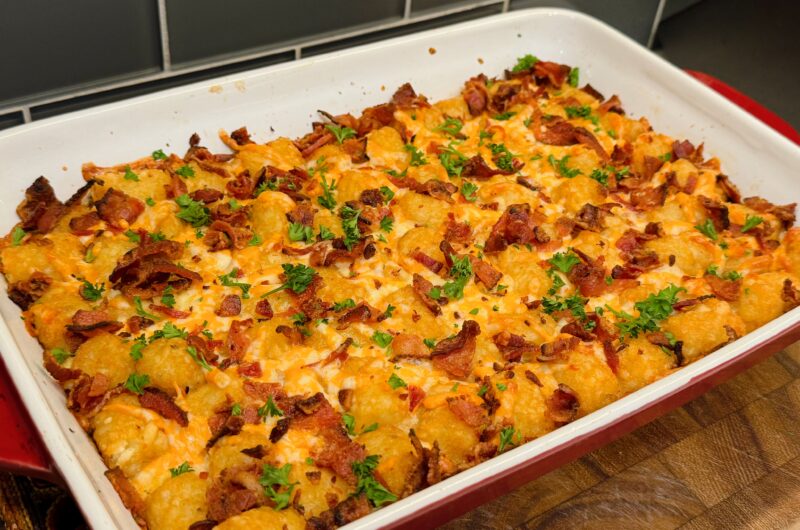
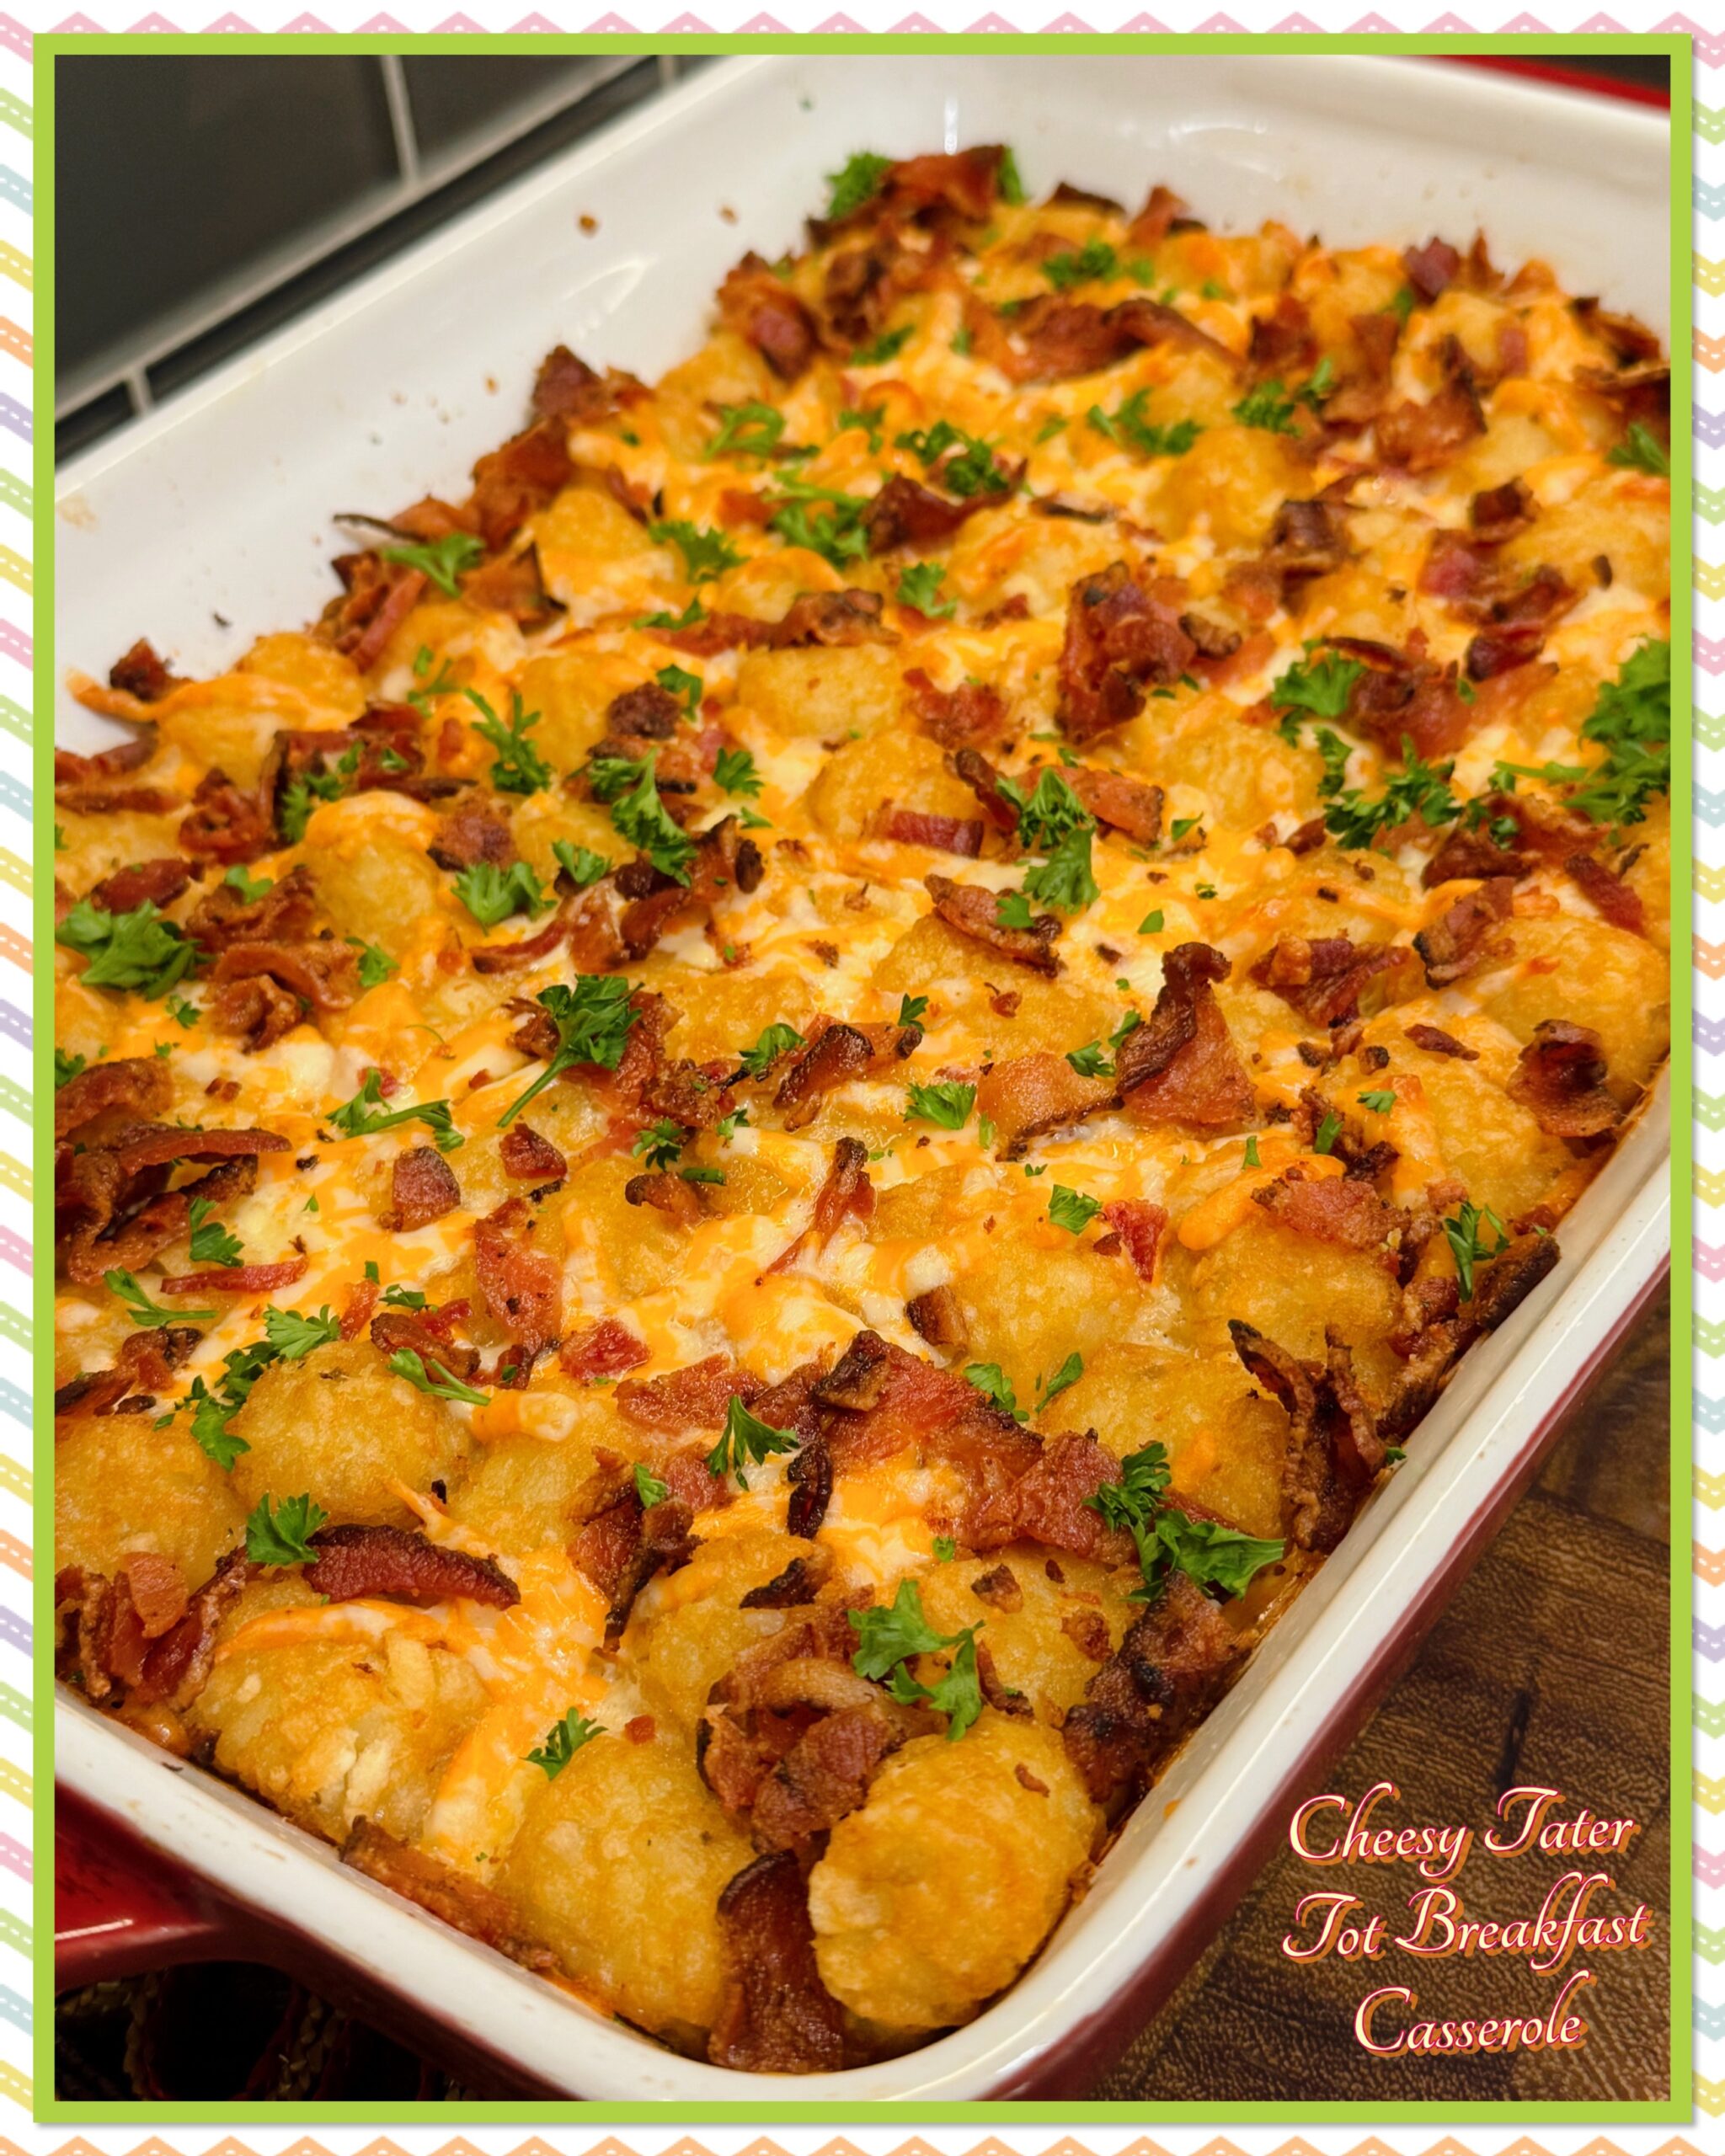
Cheesy Tater Tot Breakfast Casserole
4
servings15
minutes45
minutesIngredients
4 slices bacon, cooked and crumbled
1 lb ground sausage, no casings
2 ½ cups cheddar cheese, shredded, divided
2 cups milk
3 eggs
½ teaspoon pepper
½ teaspoon onion powder
pinch of table salt
1 bag tater tots, frozen
Garnish: parsley, chopped
Directions
In a large skillet, cook sausage on medium high heat, breaking up the meat and browning it. Once cooked through, drain and layer onto the bottom of a 9×13 inch baking pan.
Evenly sprinkle 2 cups of the cheese over cooked sausage.
In a large bowl, whisk together the milk, eggs, pepper, onion powder, and salt. Once mixed, pour evenly over the cheese and sausage in baking dish. Layer top with frozen tater tots.
When ready to bake, set oven to 350F with rack on lower middle position. Once oven reaches 350F, place uncovered casserole in oven for about 35 minutes.
Top with additional 1/2 cup cheese, cooked & crumbled bacon, and bake another 5-10 minutes or until sides are bubbling and top is golden brown. Garnish with chopped parsley, let rest at room temp 10 minutes, and serve.


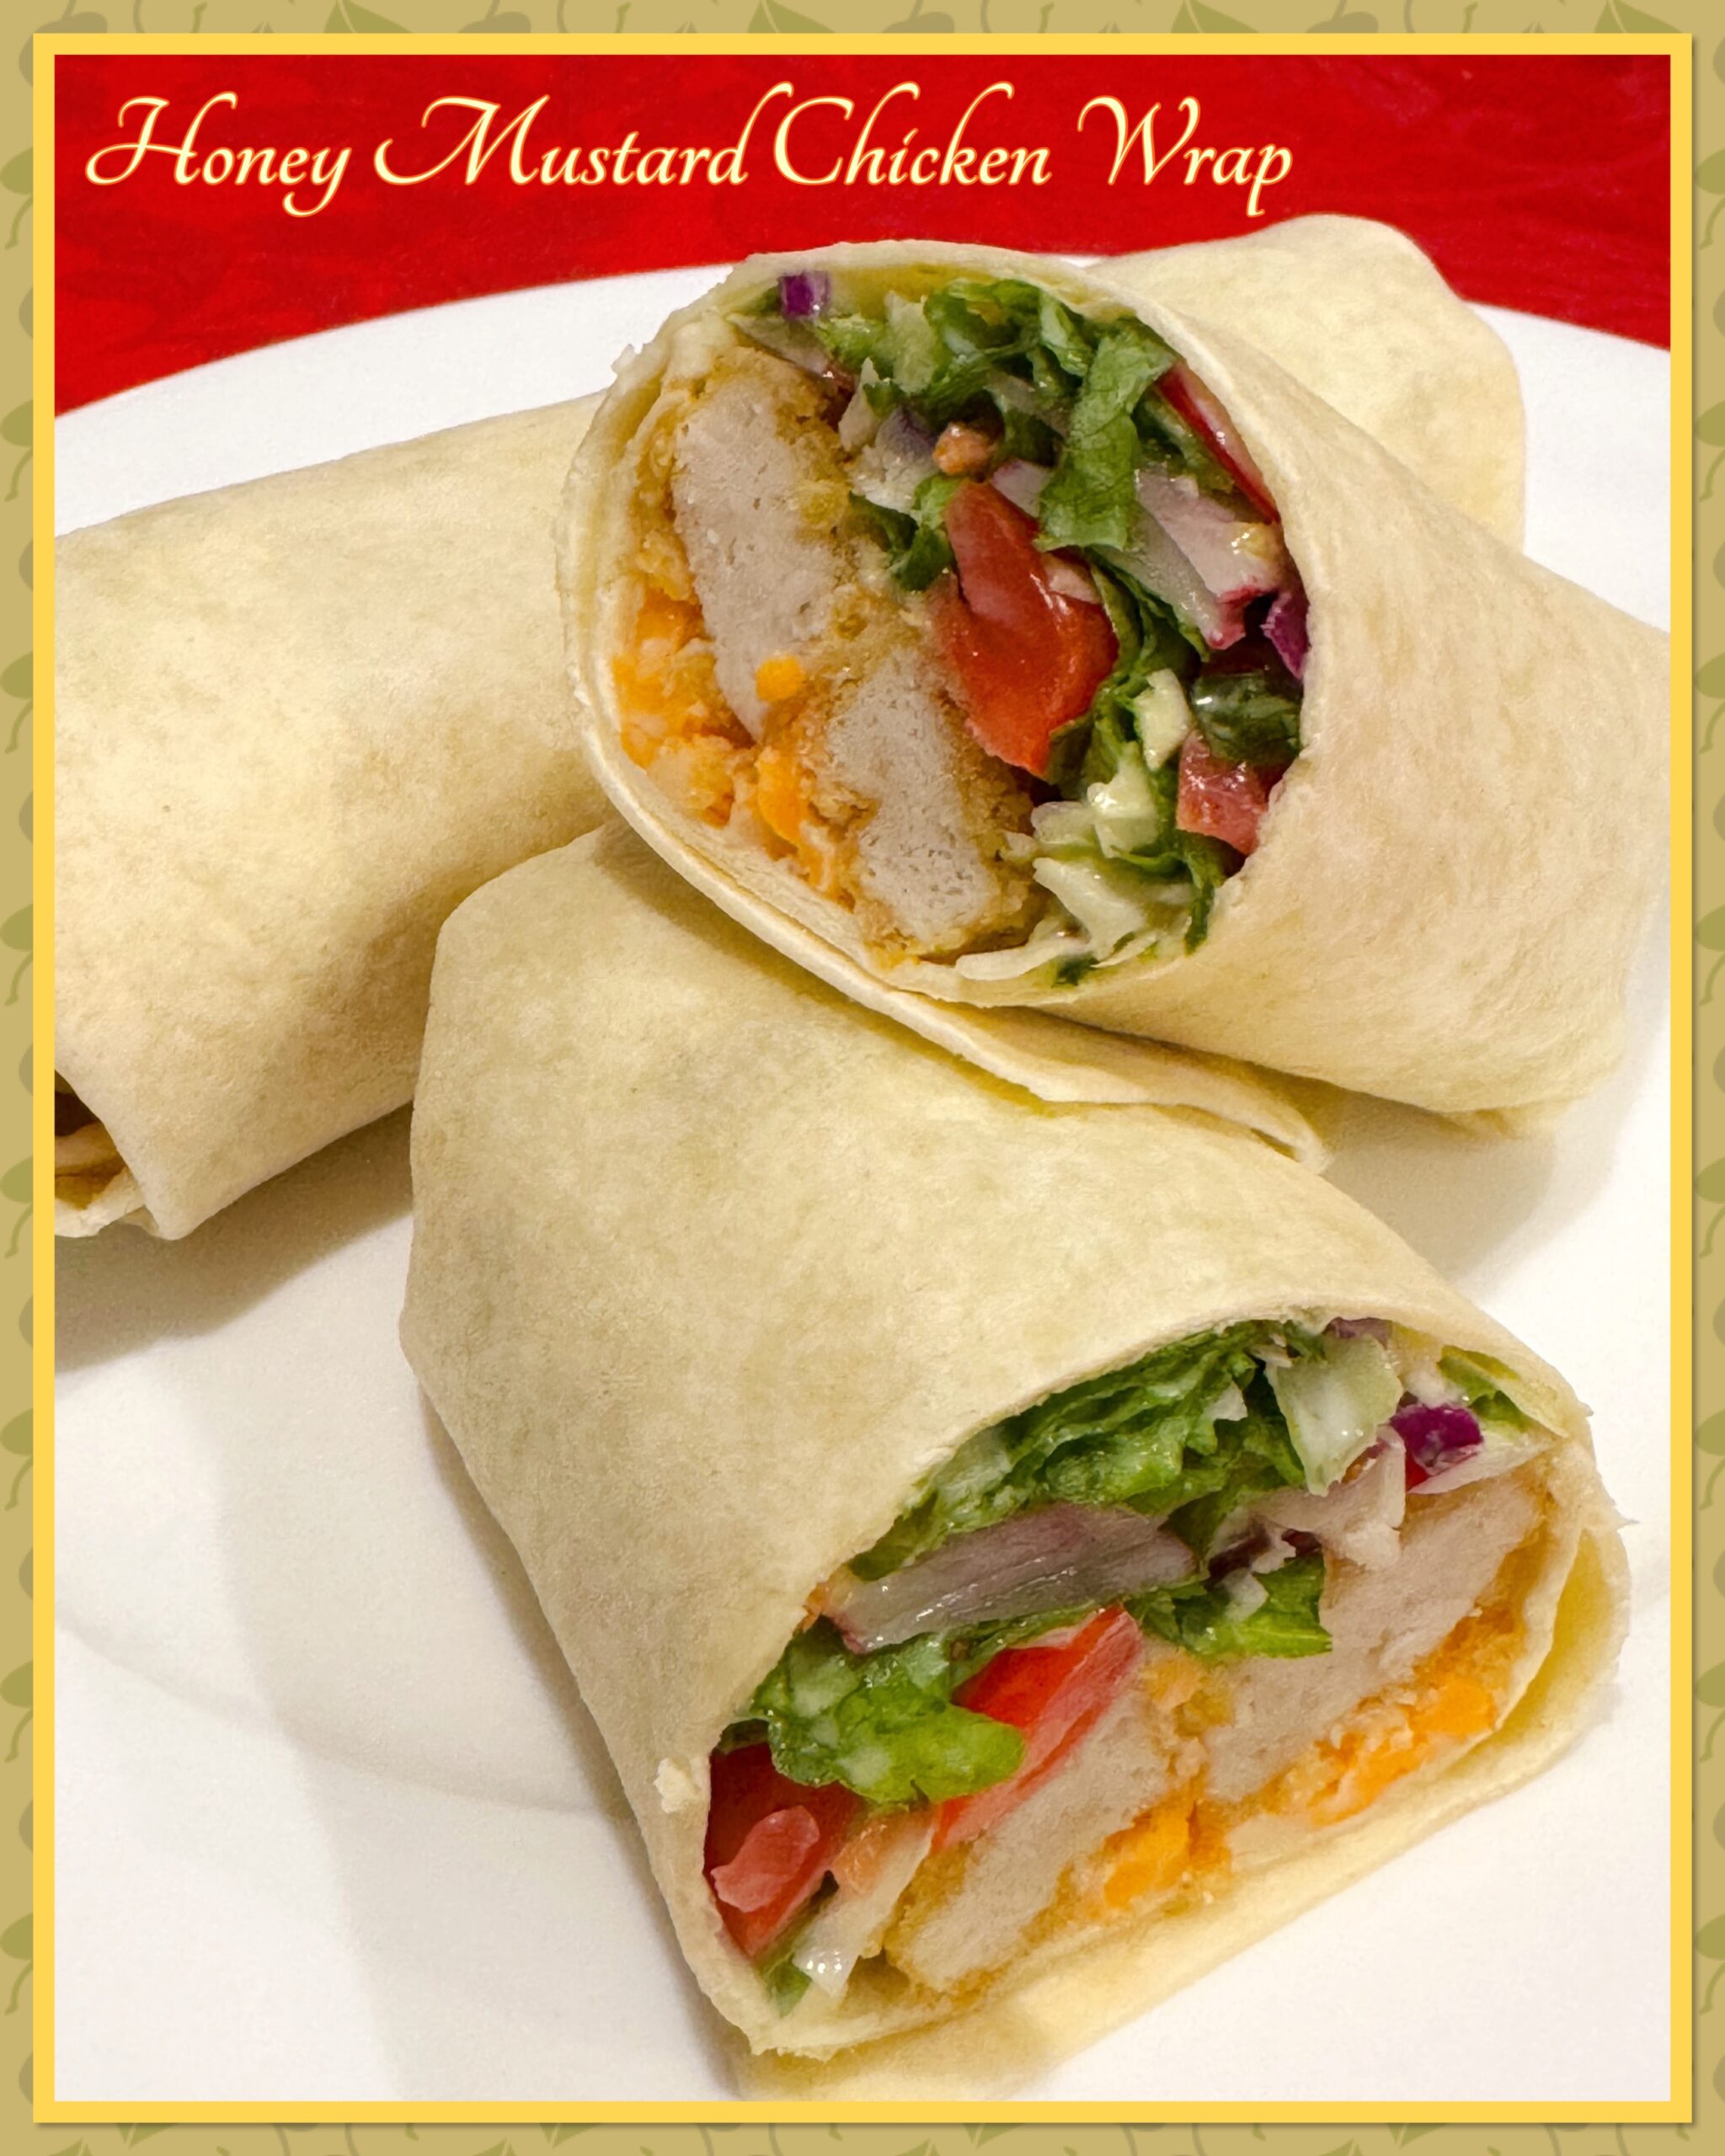
Honey Mustard Chicken Wrap
4
servings15
minutes15
minutesIngredients
8 chicken fingers
2 cups bagged coleslaw mix
2 cups lettuce, thinly sliced
2 pickles, diced
1/2 cup radishes, thinly sliced
1 cup cherry tomatoes, sliced
4 10 inch whole wheat tortillas
- Honey Mustard Sauce
4 tablespoons plain Greek yogurt
2 tablespoons mayonnaise
2 teaspoons grainy Dijon mustard
4 teaspoons honey
4 teaspoons white vinegar
Directions
Cook chicken fingers according to the instructions.
Whisking together all sauce ingredients in a small bowl.
In a large bowl, combine coleslaw mix, shredded lettuce, pickles, radishes and cherry tomatoes.
Drizzle with about ¾ of the honey mustard sauce
Add 1/4 of the coleslaw mixture to the centre of each tortilla, top each with 2 chicken fingers, sprinkle with ¼ cup of cheese and finish with a drizzle of the honey mustard sauce.
Wrap up your tortillas by folding in the sides, bringing the bottom flap up and continuing to roll gently pressing down to make sure the wrap is tight.


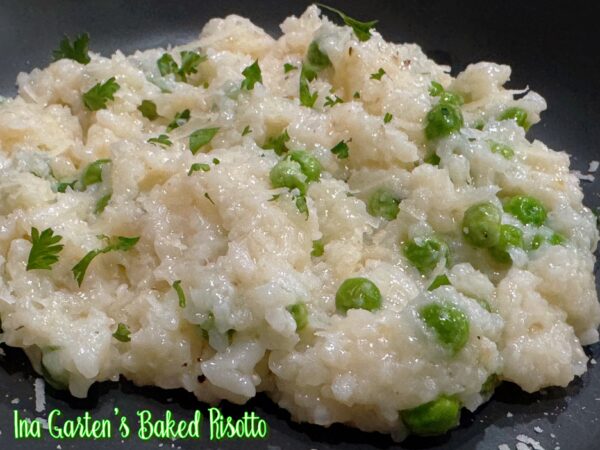
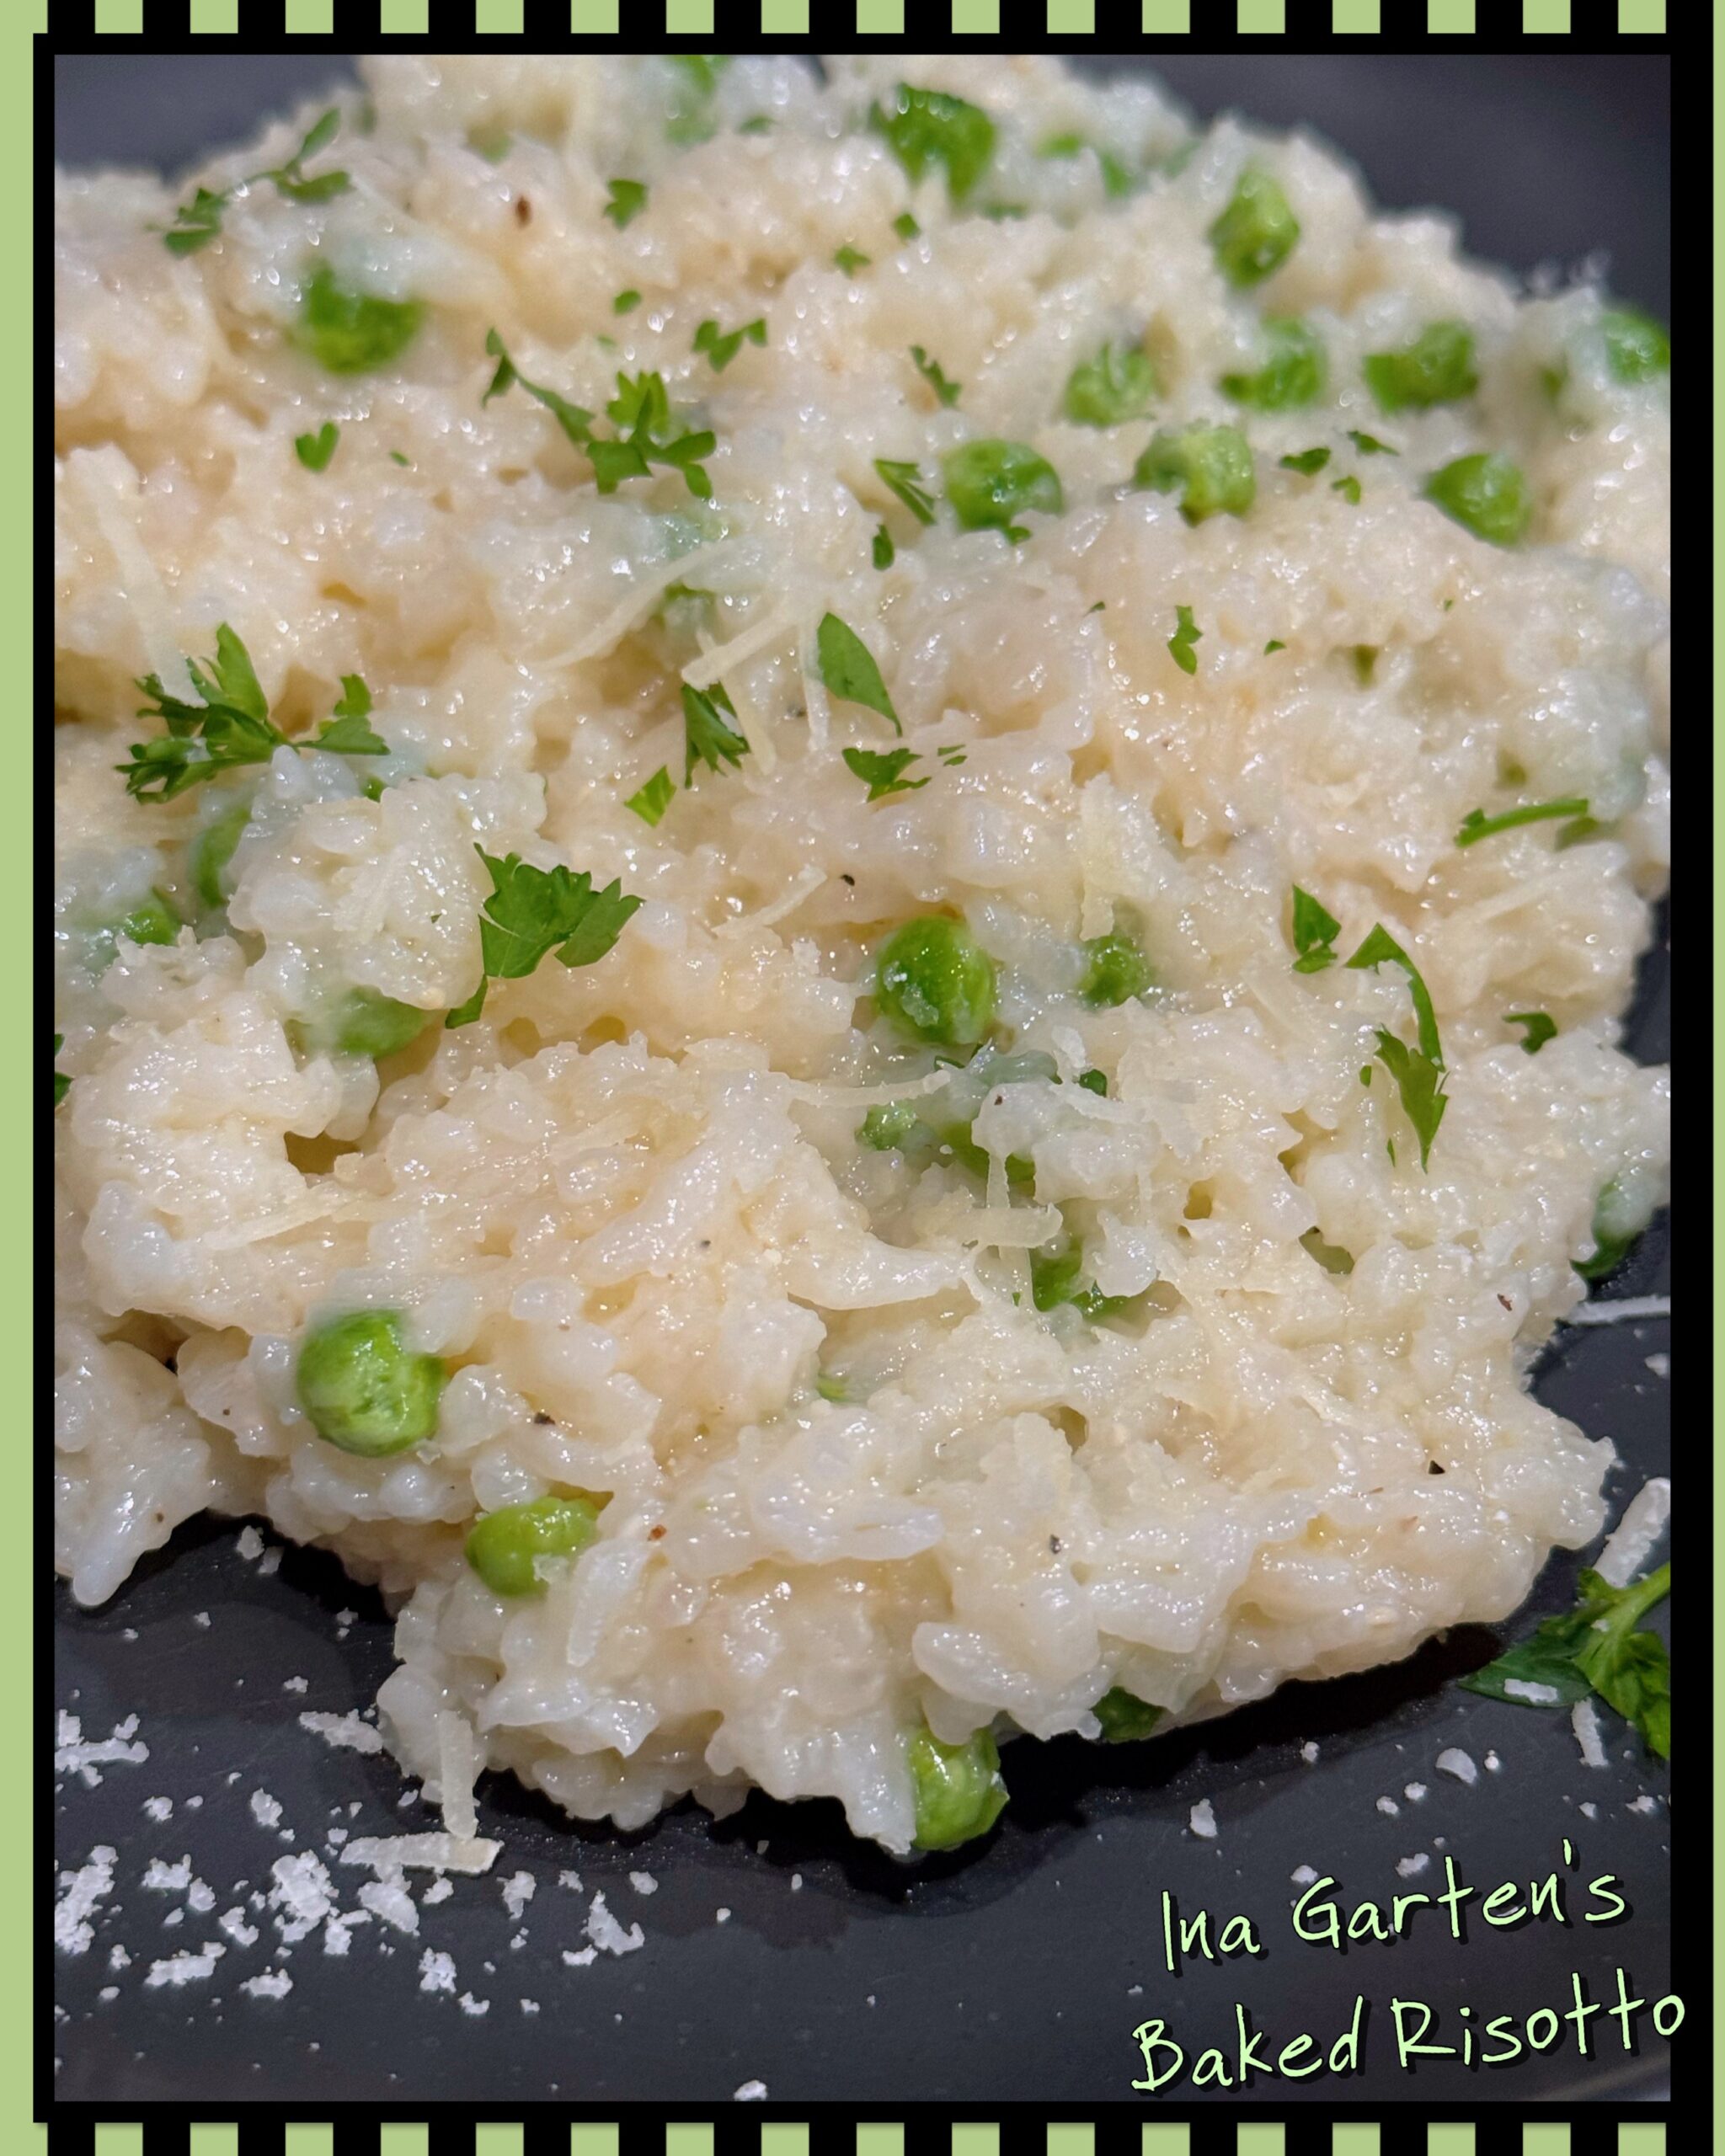
Ina Garten's Baked Risotto
4
servings10
minutes55
minutesIngredients
1 1/2 cups Arborio Rice
4 cups chicken stock
1 cup Parmesan, grated
1 cup dry white wine
4 tablespoons unsalted butter
2 tablespoons olive oil
1 teaspoon salt
1 teaspoon pepper
1 cup peas, thawed
Garnish: 1/4 cup parsley, chopped
Directions
Preheat your oven to 350°F.
In your Dutch oven, combine the Arborio rice, chicken stock, and dry white wine. Sprinkle in salt and pepper, stirring gently.
Cover the pot with a lid or aluminum foil and bake for 45 minutes.
Remove the pot from the oven and stir the risotto vigorously. Add the freshly grated Parmesan cheese, butter, and olive oil to the risotto. Stir until everything is melted and combined.
Gently fold in the thawed frozen peas, allowing them to heat through for 2–3 minutes.
Garnish with freshly chopped parsley and additional Parmesan cheese.


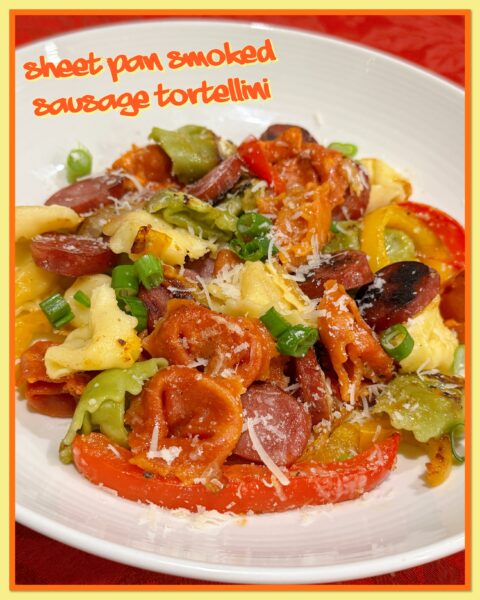

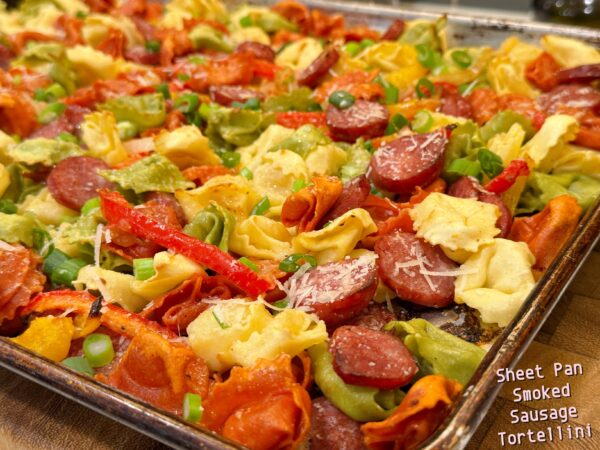
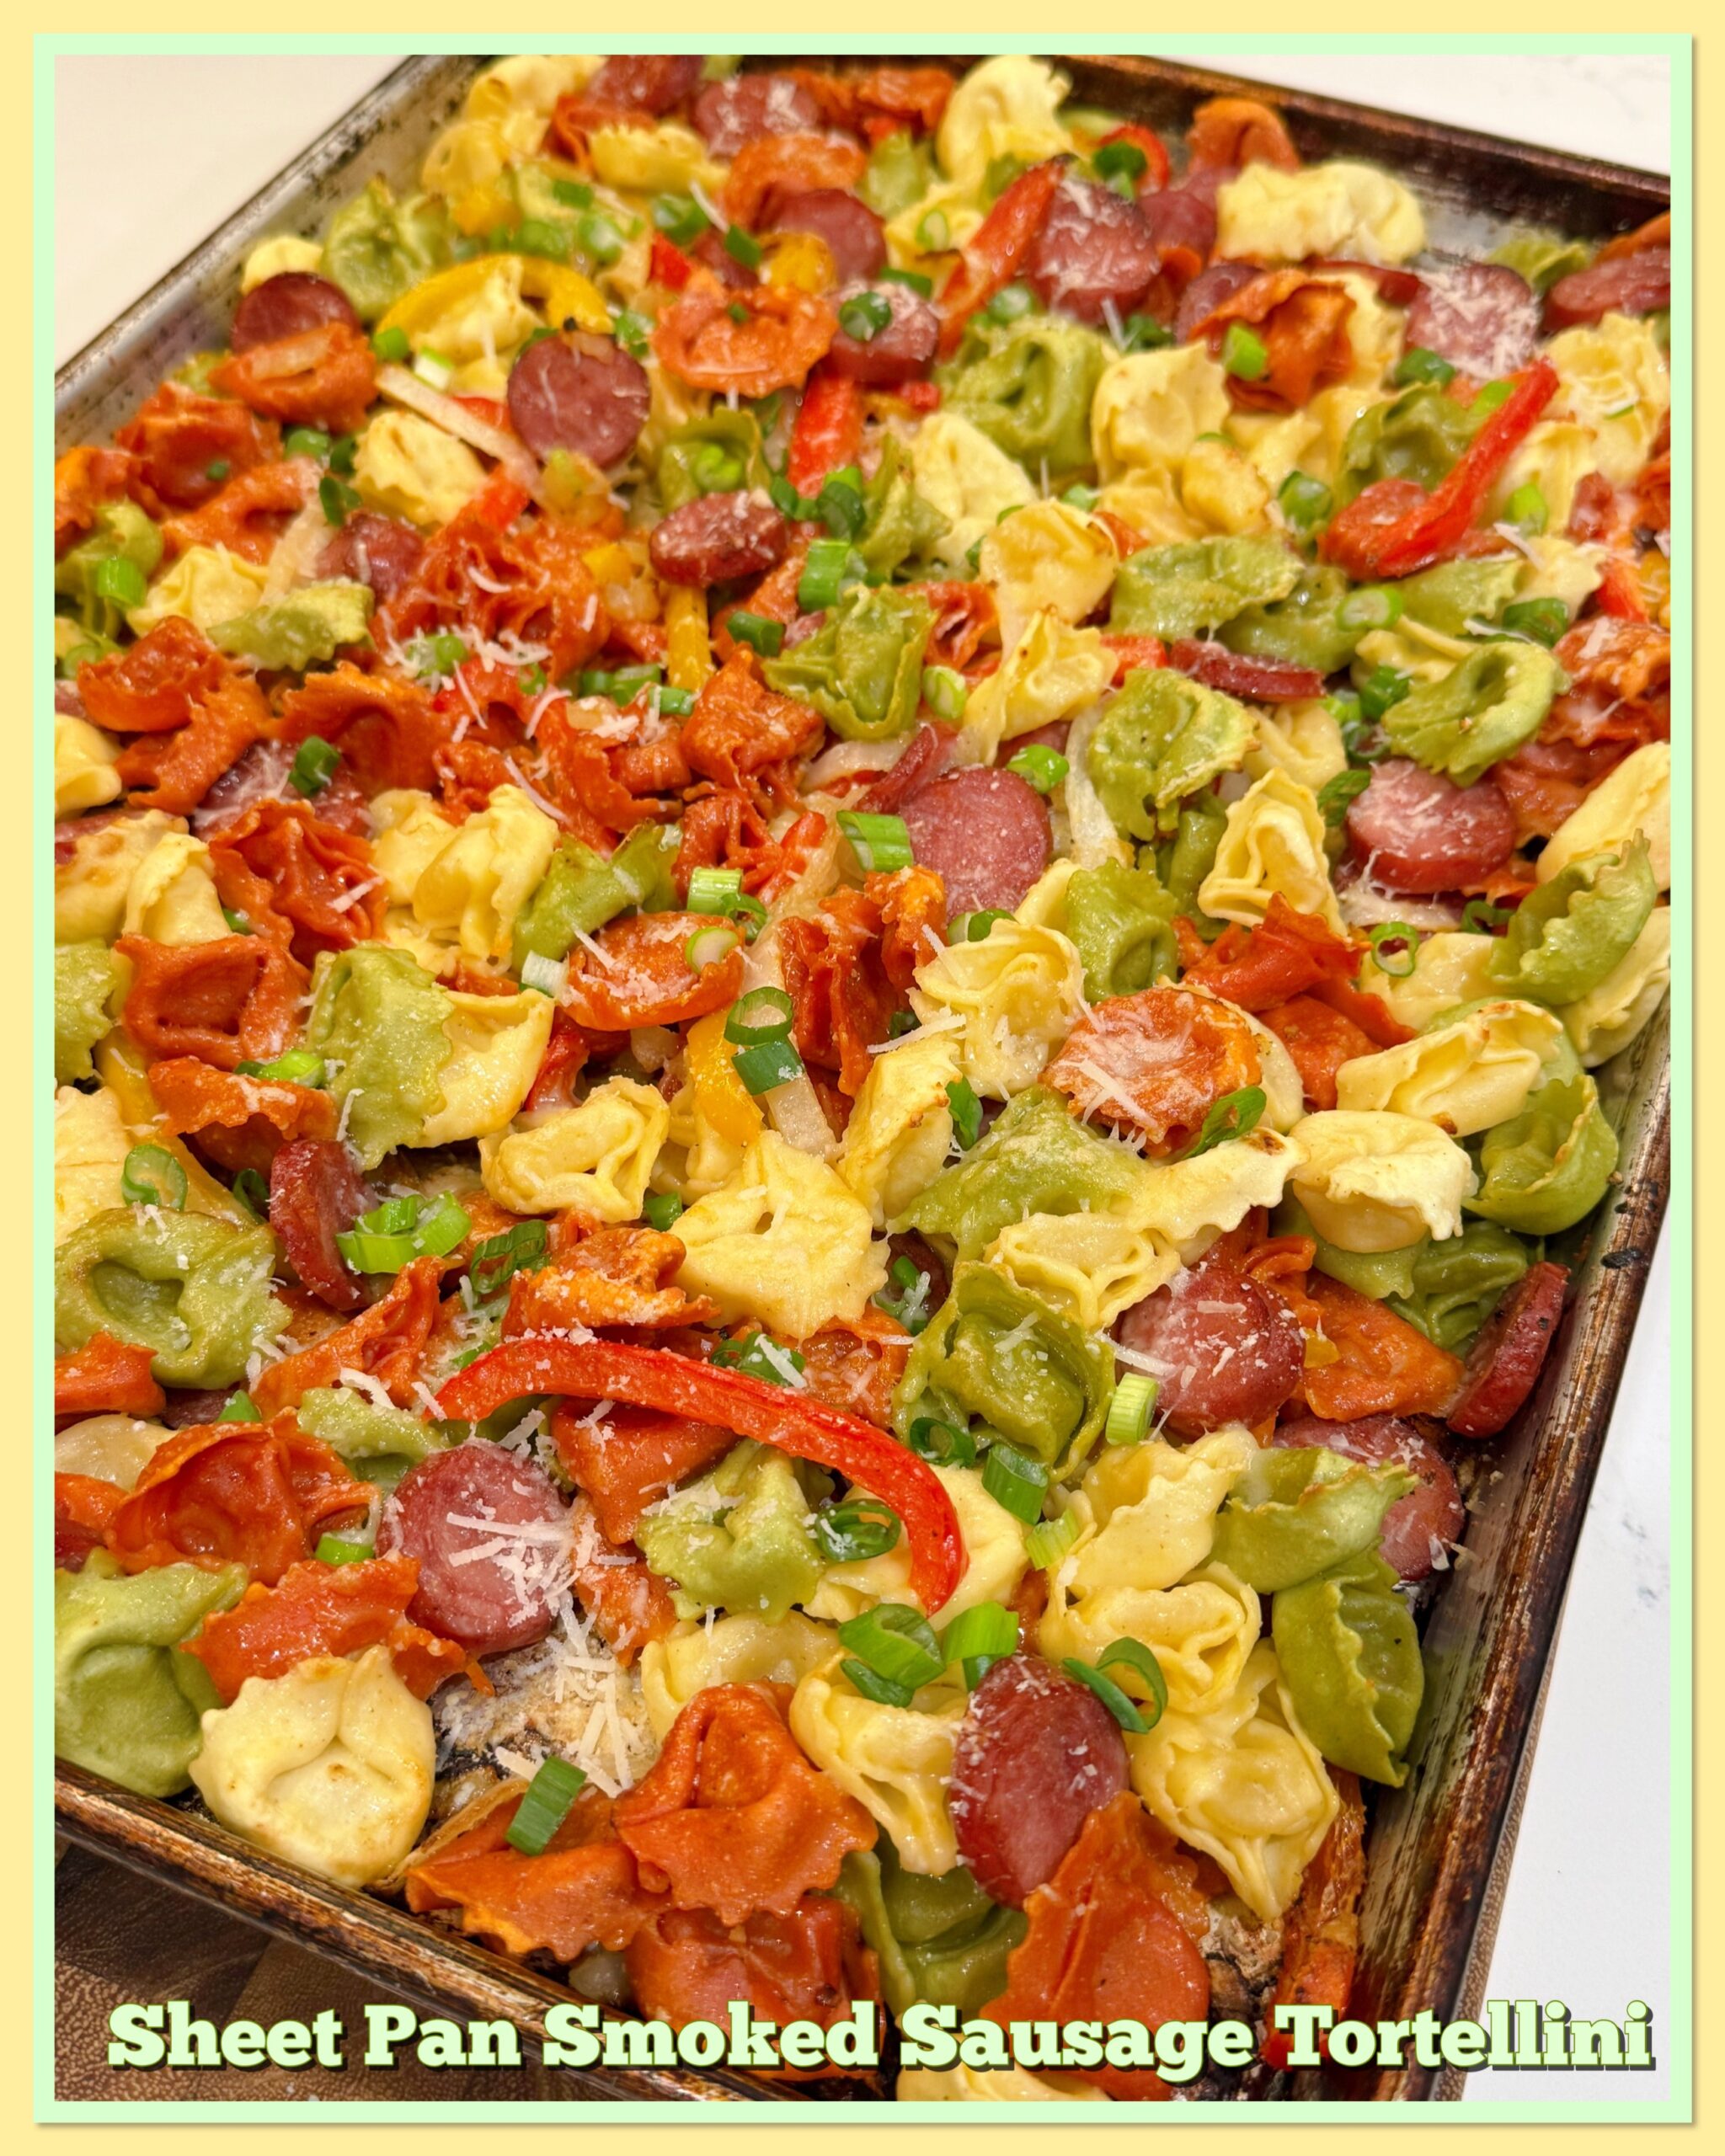
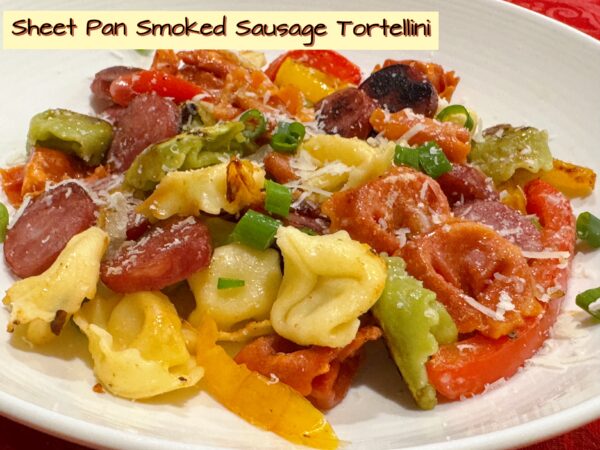
Sheet Pan Smoked Sausage Tortellini
4
servings10
minutes30
minutesIngredients
1 sweet onion, thinly sliced
2 bell peppers, thinly sliced
4 tablespoons olive oil
salt and pepper, to taste
½ teaspoon garlic powder
1 lb smoked sausage, cut into rounds
1 package tortellini
½ cup Parmesan cheese, finely grated
Garnish 3 tablespoons green onions, chopped & Parmesan cheese, grated
Directions
Preheat the oven to 425F.
Place the onions and peppers on a baking sheet. Toss with 2 tablespoons of the olive oil and a big pinch of salt and pepper, along with the garlic powder. Toss well.
Place the rounds of smoked sausage on top of the peppers and onions, nestled into the sheet pan.
Roast for 15 to 20 minutes.
While the sausage and vegetables roast, bring a pot of salted water to a boil. Cook the tortellini according to the directions, shaving 1 minute off the cook time. Drain once it’s finished.
Remove the pan from the oven. Add the tortellini to the sheet pan and toss well with the remaining 2 tablespoons of olive oil. Sprinkle on the parmesan cheese.
Return the pan to the oven for 10 to 15 more minutes, tossing once or twice during cook time.
Remove the pan. Serve immediately with a sprinkling of green onions and more parmesan.


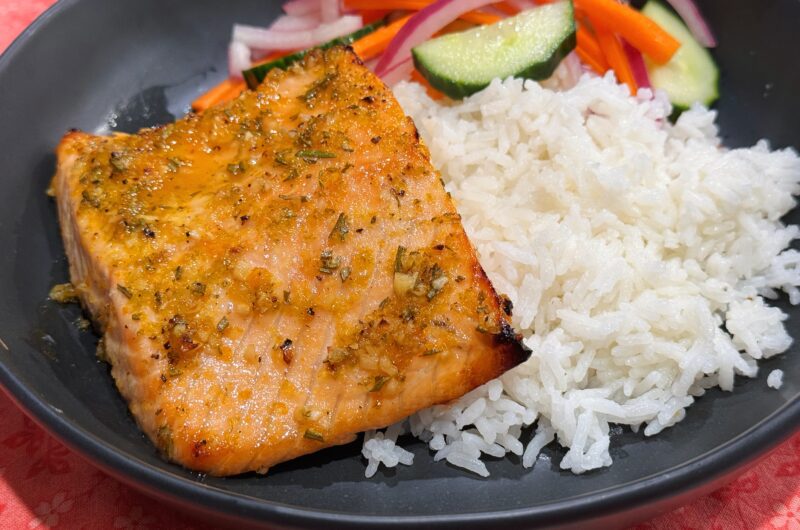
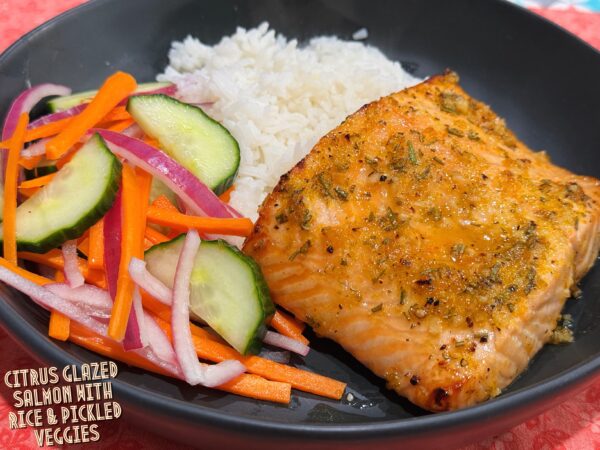
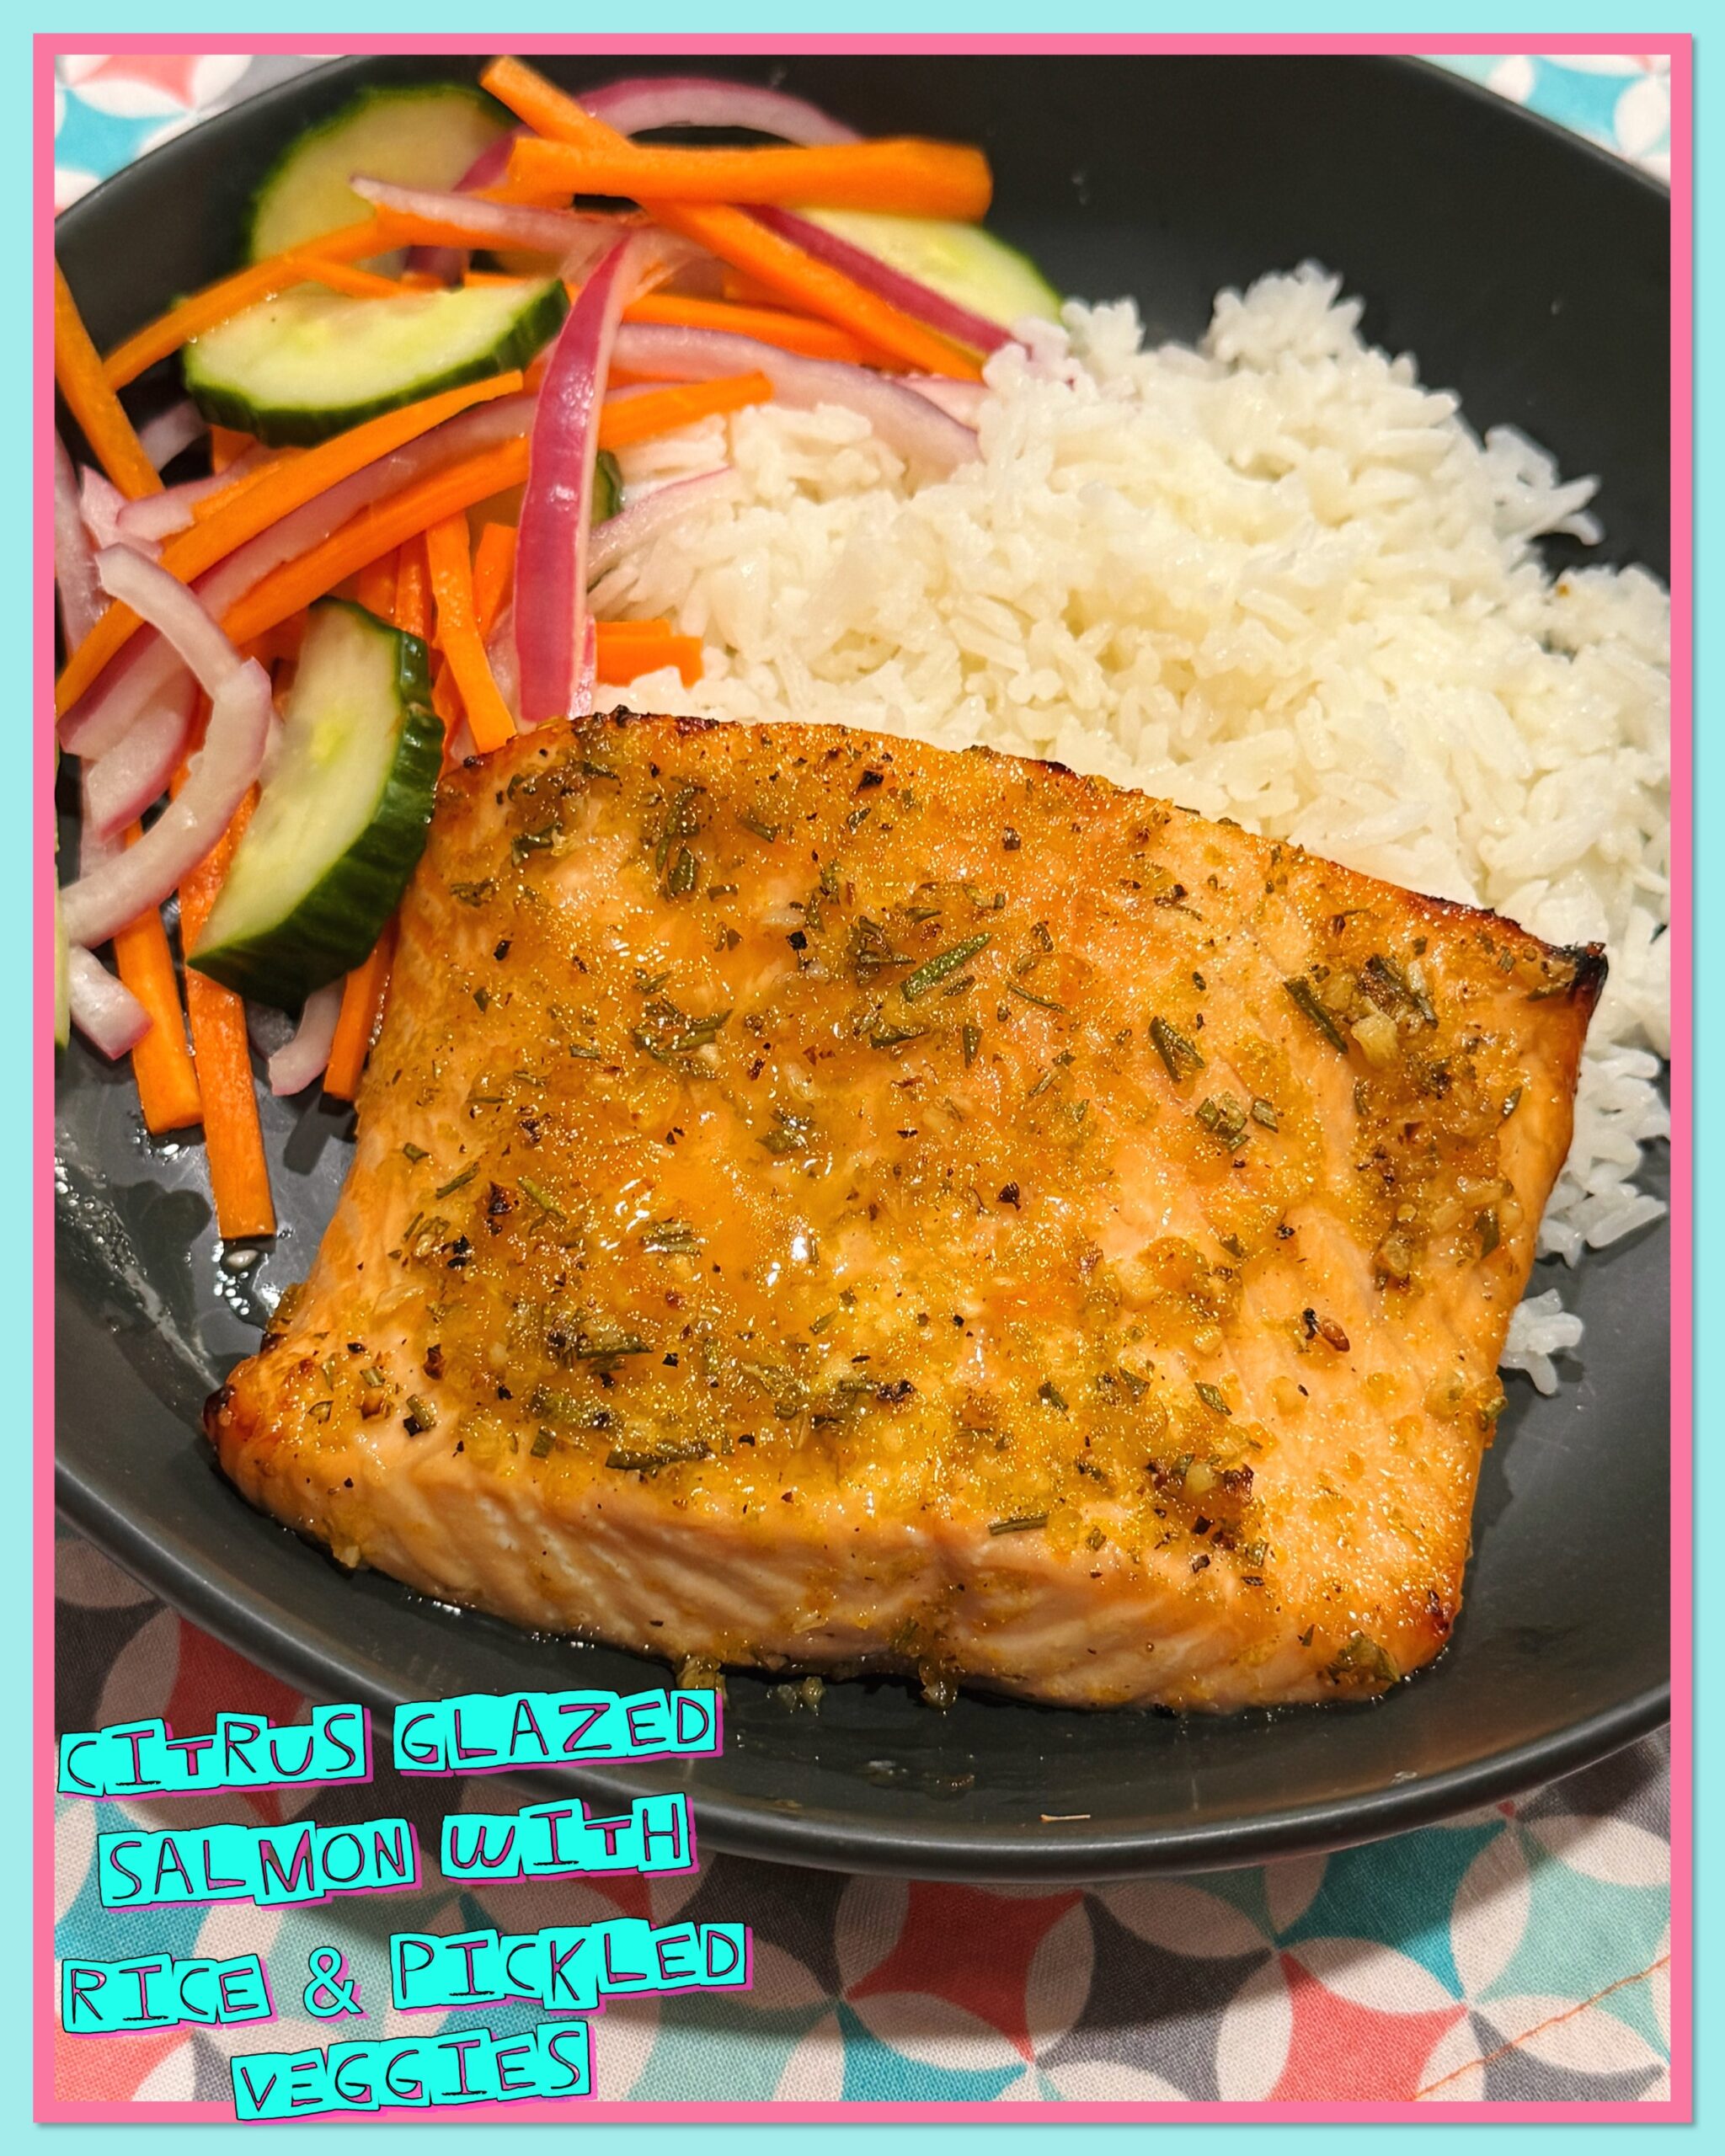
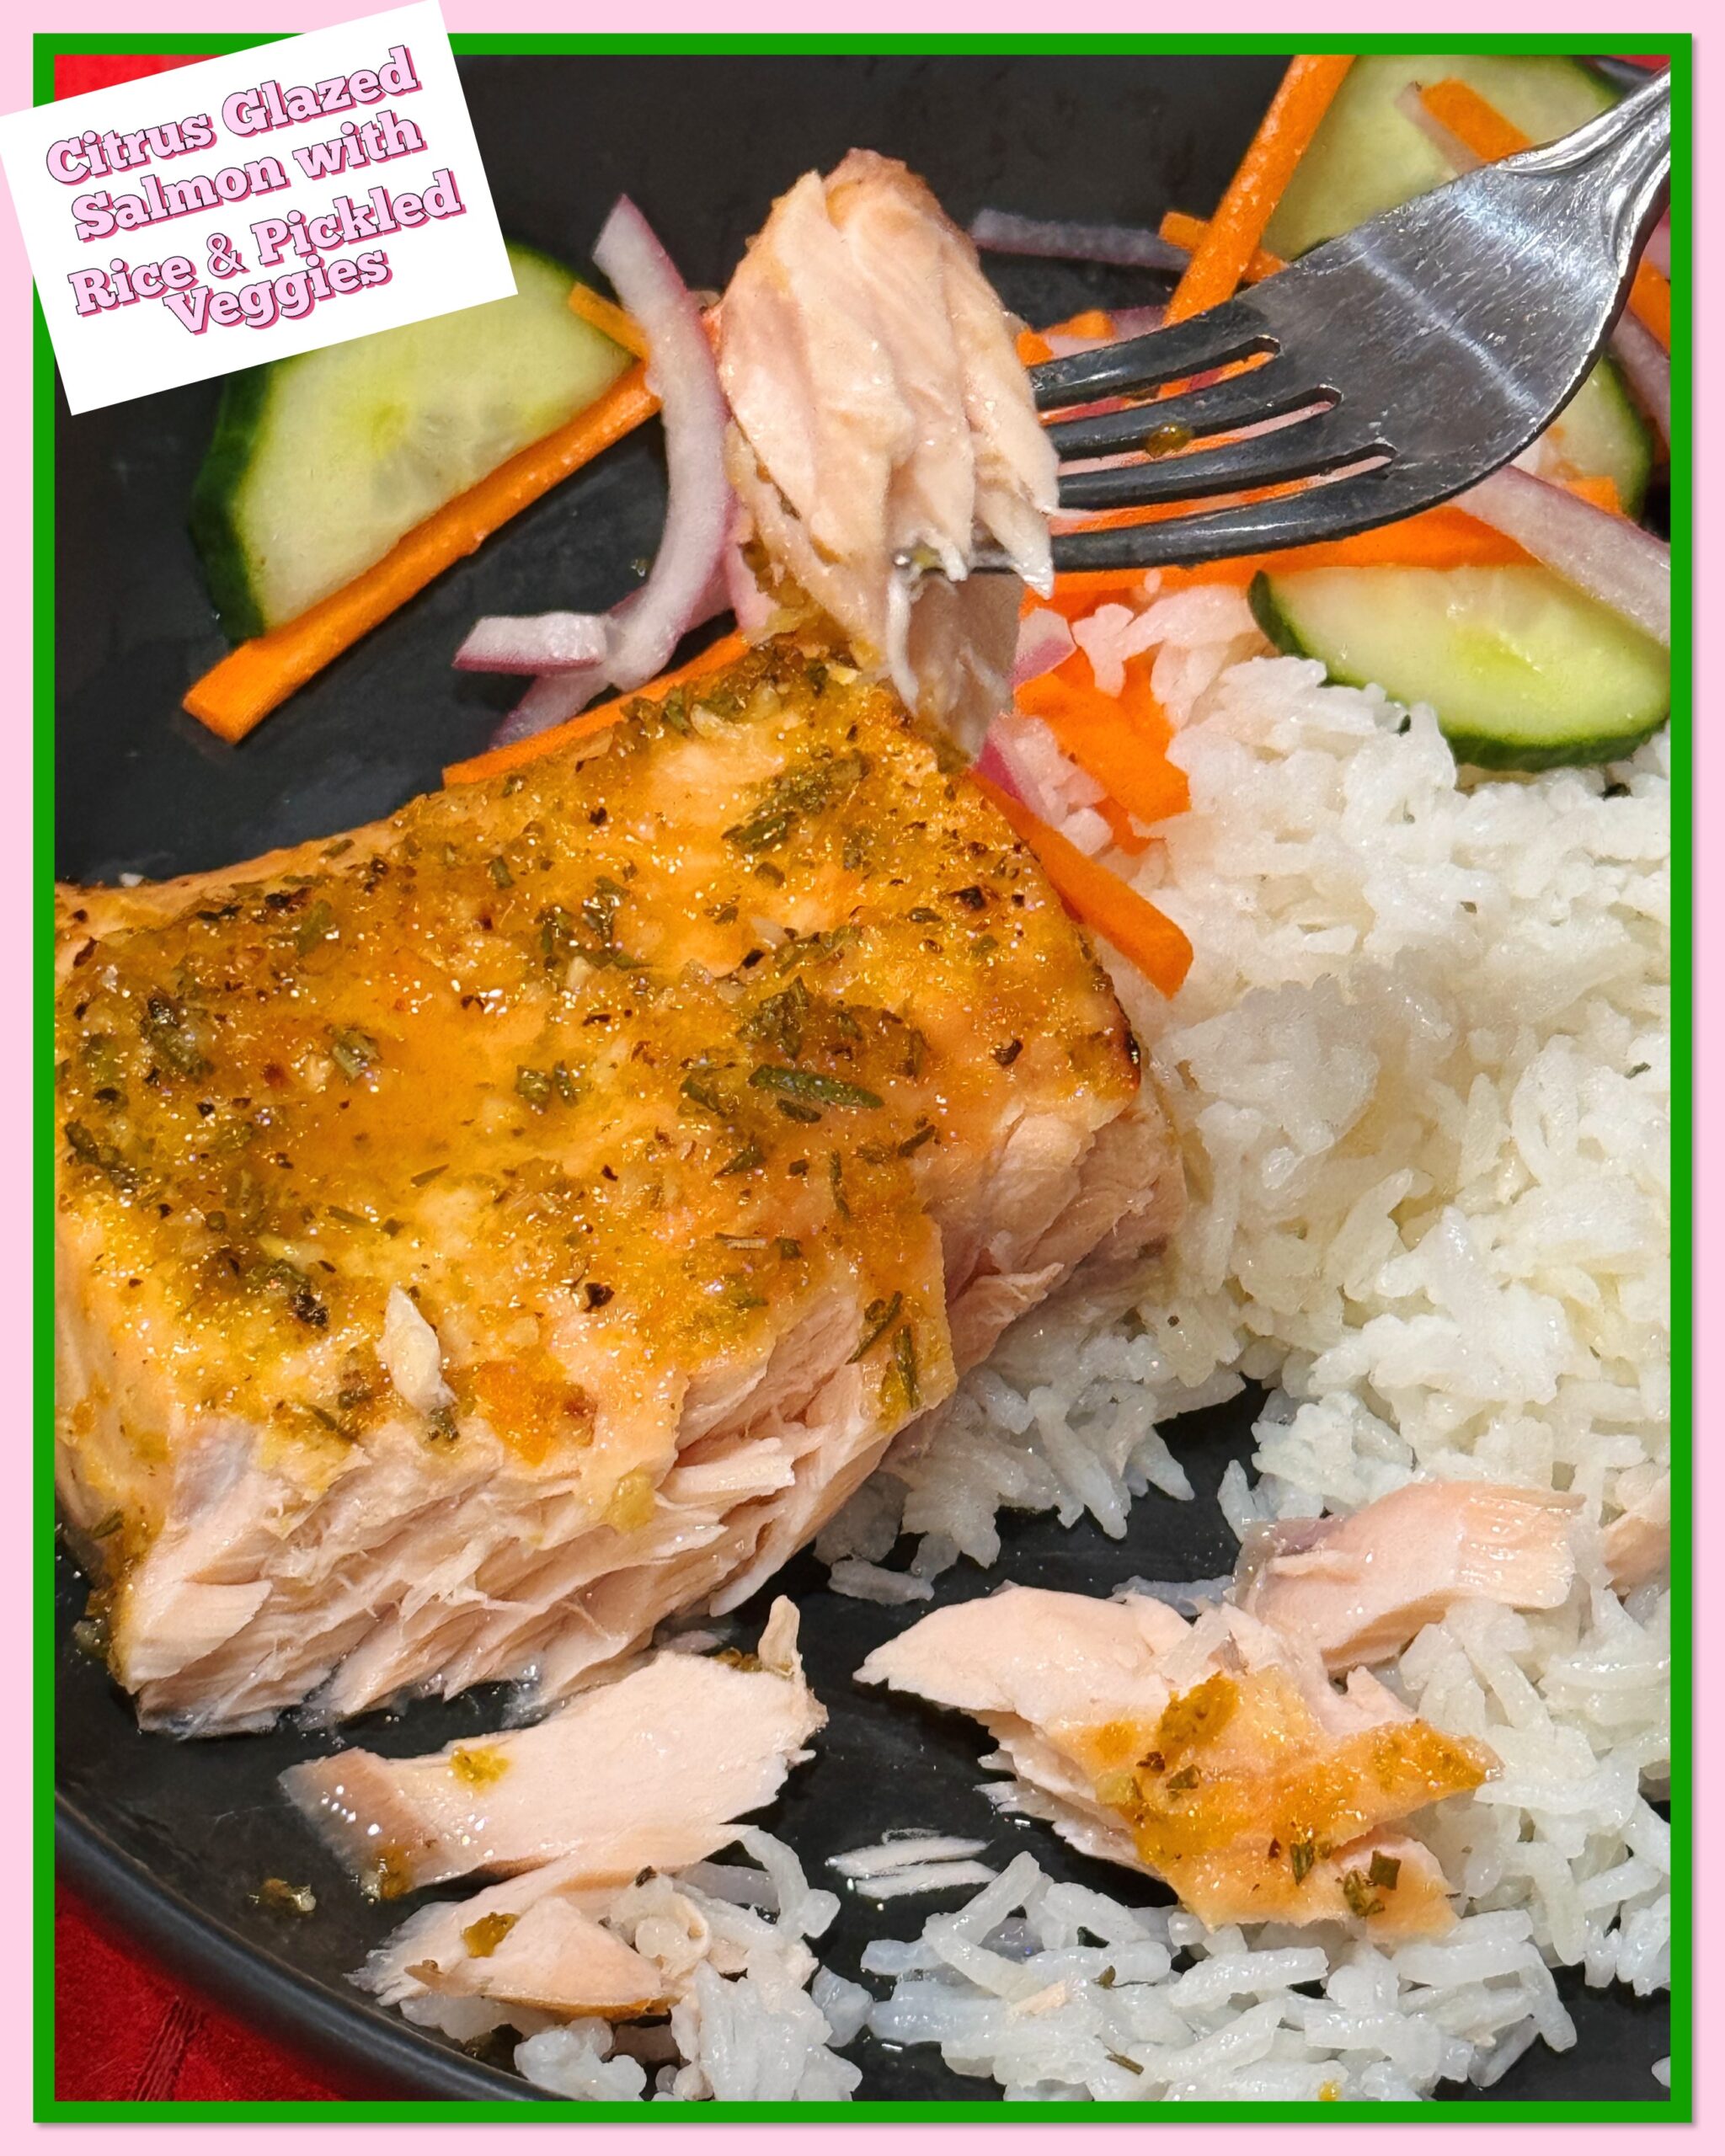
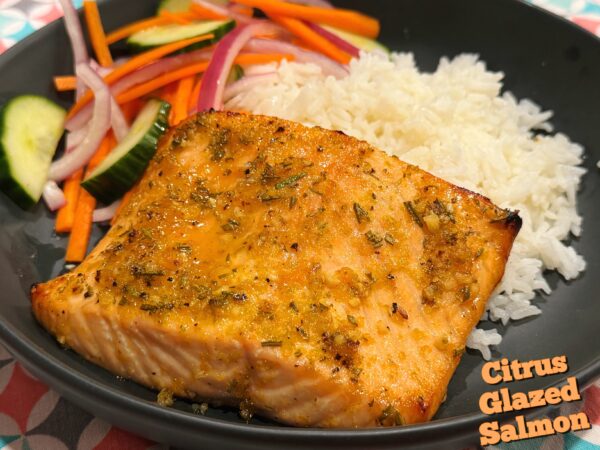
Citrus Glazed Salmon
4-6
servings65
minutes15
minutesIngredients
24 oz salmon, cut into 6 pieces
zest and juice of 2 limes
zest and juice of 1 lemon
zest and juice of 1 orange
3 cloves garlic, minced
¼ cups honey
2 tablespoons olive oil
2 teaspoons rosemary, chopped
½ teaspoons salt
¼ teaspoons pepper
Directions
Add the zest and juice of the lemon, orange and limes to a small mixing bowl. Add in the rosemary, salt, pepper, olive oil, garlic and honey, then whisk to combine.
Place the salmon in a container, then pour the citrus marinade over the tops of the salmon, making sure add sides are coated. Allow the salmon to marinate in the fridge for 1 hour.
Take the salmon out of the fridge and allow to come to room temperature while you preheat your oven to 425°F.
Pour the marinade into a small saucepan and simmer for 10 minutes to make a glaze.
Transfer the salmon to a baking sheet with a wire rack, and line the baking sheet with aluminum foil for easier cleanup.
Bake the salmon for 10 minutes, then remove and brush the tops with the marinade glaze. Turn on the broiler and broil for an additional 2-4 minutes or until they reach an internal temperature of 125°F-145°F.


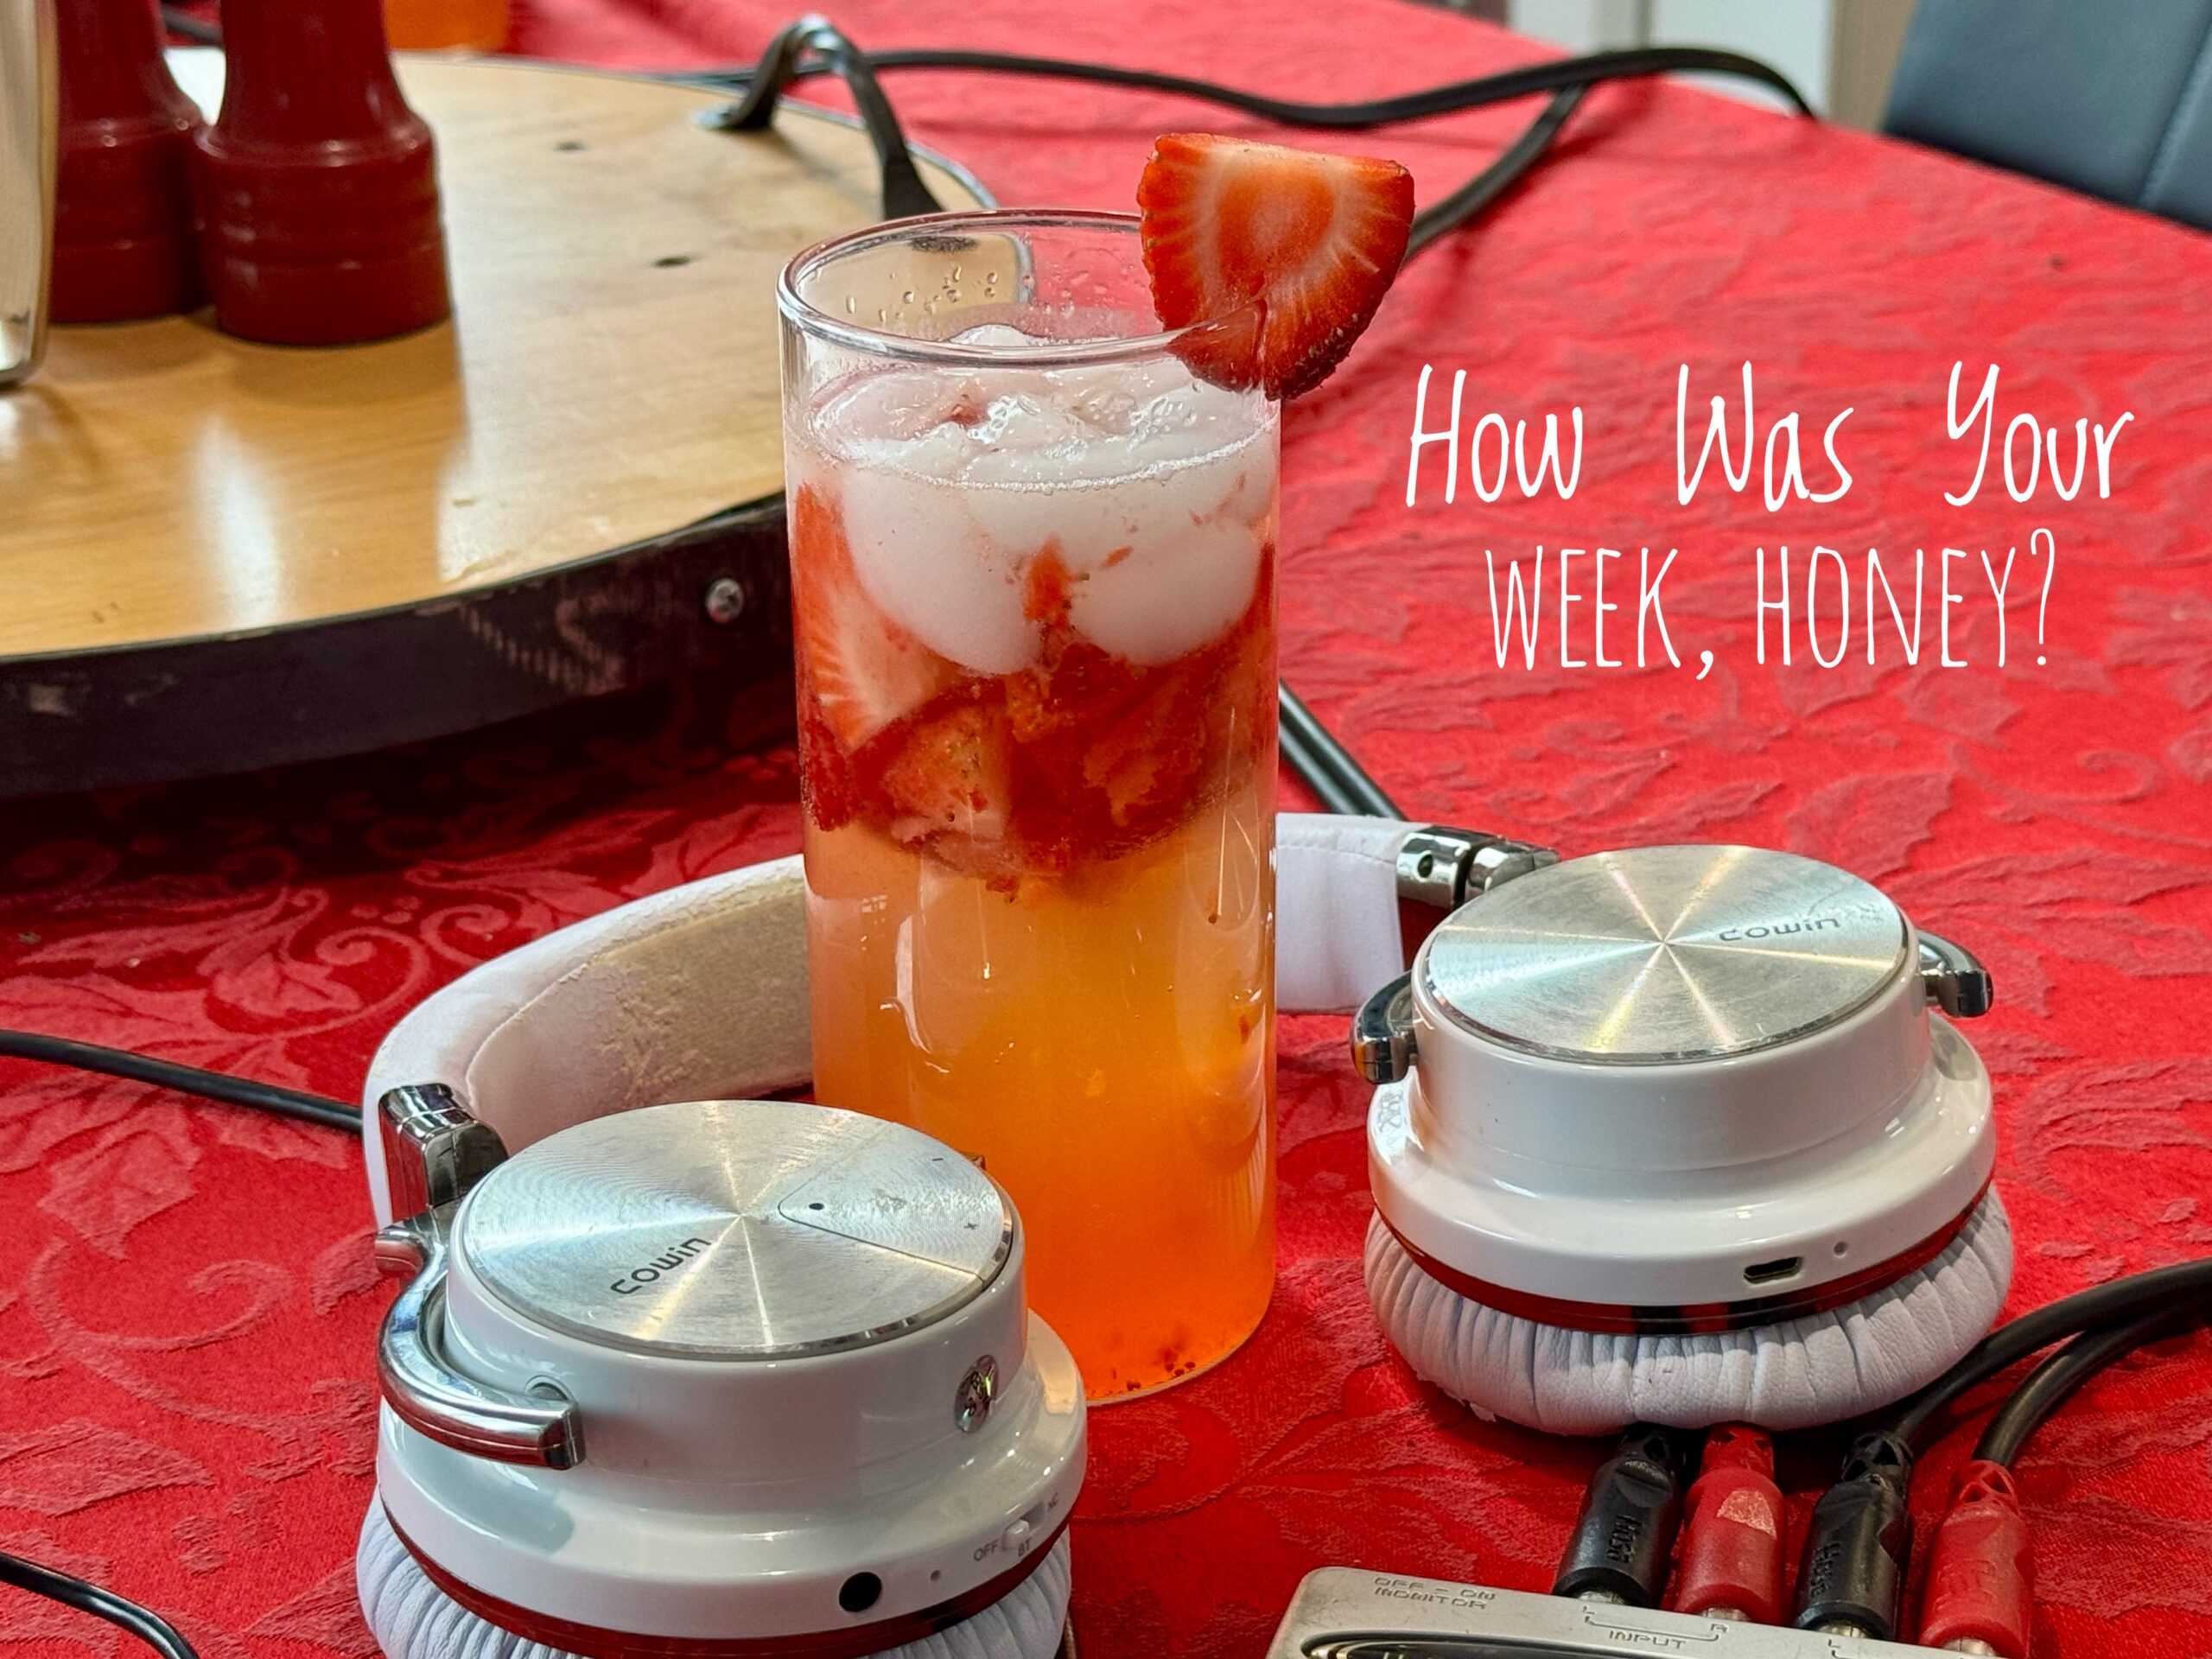
Check out How Was Your Week, Honey? Ep. #452 No Longer in Control. This week, we get together to discuss: phone withdrawal, Canada AM, learning to drive, SOW, and purging old CD’s.
Thank you to Mostly Blogging for featuring my Olympic and Sunday Dinners post and My Wee Abode for featuring my February Meal Plan at their Inspire Me Monday Link Party and Tuesday Turn About Link Party last week.


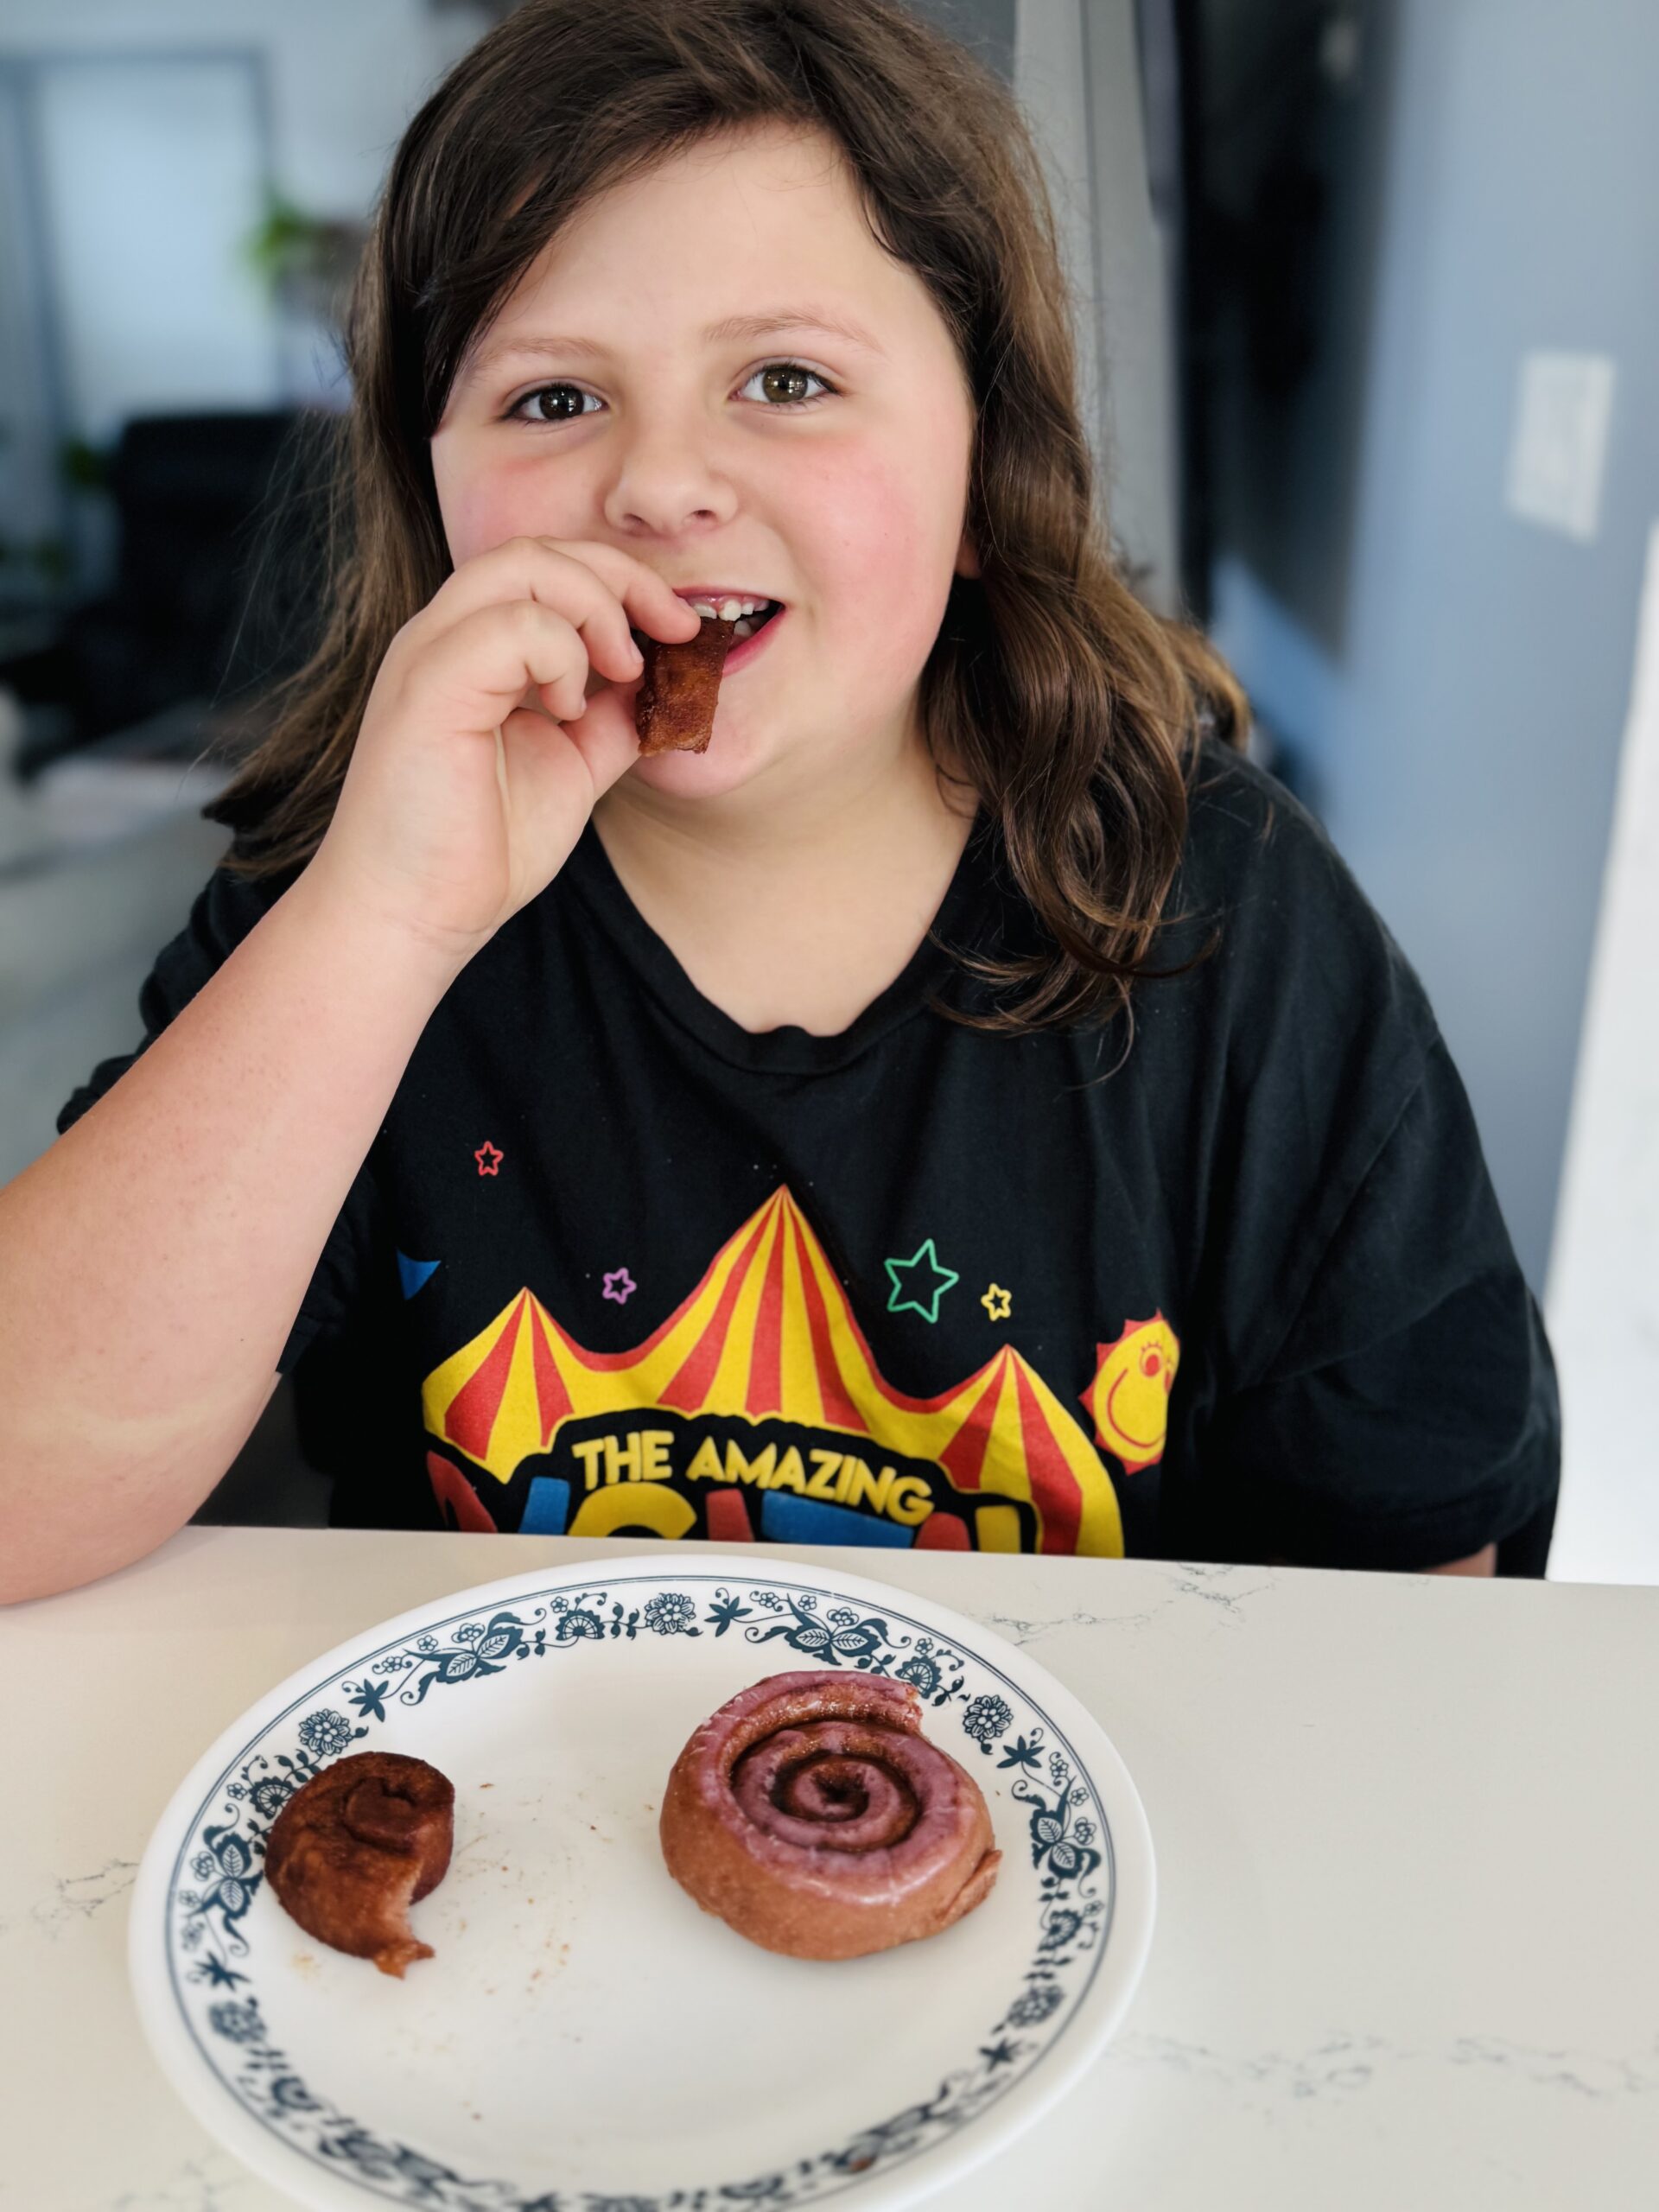
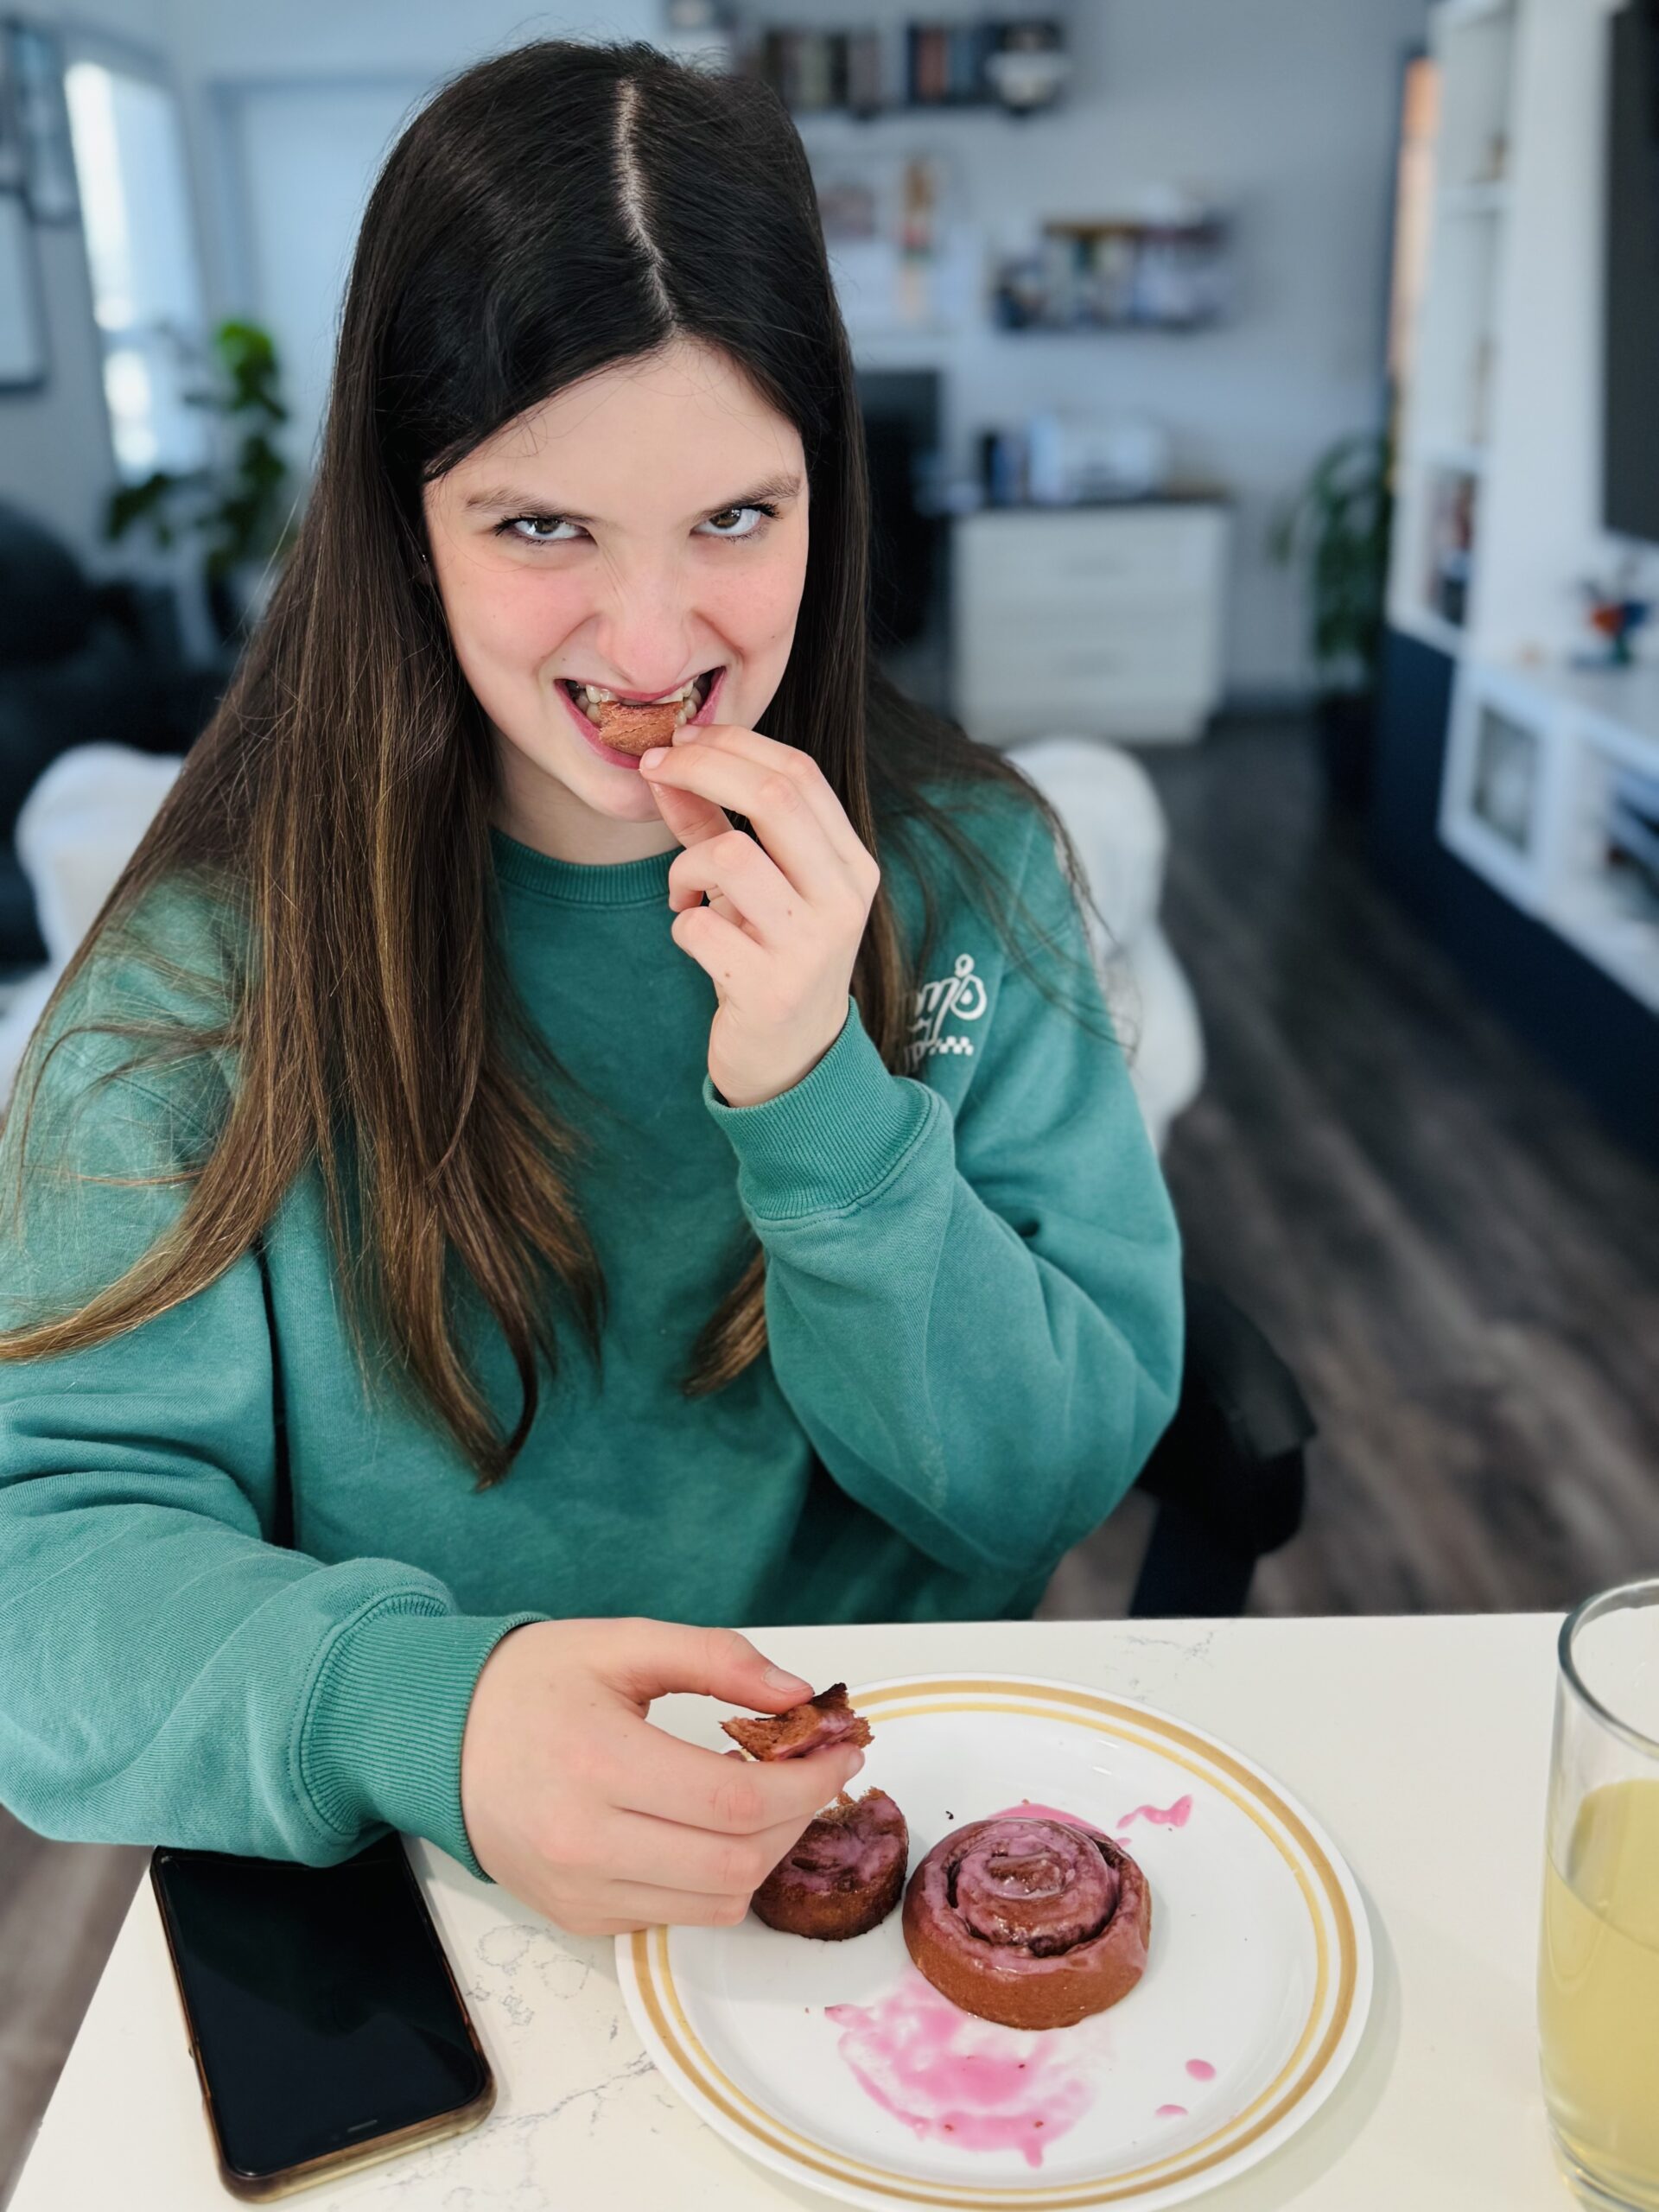
Busy week! HBear joined the Pen High concert band for an evening of music and SBean performed at the Kiwanis Festival where she got 1st place and the session medal for bringing peace and calmness with her piece 😳😂. This weekend SBean joined the mt Sis & her family for Maplefest and then we had a cousin sleepover which included VR, BNA, Hoppers, and homemade cinnamon rolls while HBear enjoyed the weekend in Vancouver cheering on the Penticton Robotics Team and exploring Science World.


7 thoughts on “March: 7 Day Meal Plan”
THe Chicken looks great! #HappyNow
Thank you!
That sounds like such a delicious week!
Thank you!
Pingback: Busy Monday 714
What a great meal plan. These sound awesome.
Thanks so much for sharing with Sweet Tea &Friends this month dear friend.
Thank you and thank you so much for hosting the Sweet Tea Link Party. I look forward to seeing what other bloggers are doing. See you again next time!